UG9wcGluczo1MDA=
LnRiLWNvbnRhaW5lciAudGItY29udGFpbmVyLWlubmVye3dpZHRoOjEwMCU7bWFyZ2luOjAgYXV0b30gLndwLWJsb2NrLXRvb2xzZXQtYmxvY2tzLWNvbnRhaW5lci50Yi1jb250YWluZXJbZGF0YS10b29sc2V0LWJsb2Nrcy1jb250YWluZXI9IjE0NDk5ZWNjNTNjNDIyODA2ZDdlYjgyYzkyY2M3MDYxIl0geyBib3JkZXItcmFkaXVzOiAyMHB4O2JhY2tncm91bmQ6bGluZWFyLWdyYWRpZW50KHJnYmEoIDIzMiwgMjIyLCAyNDUsIDAuMDIgKSxyZ2JhKCAyMzIsIDIyMiwgMjQ1LCAwLjAyICkpLCAgcmdiYSggMjU1LCAyNTUsIDI1NSwgMCApIHVybCgnaHR0cHM6Ly9wdGMud3BtbC5vcmcvd3AtY29udGVudC91cGxvYWRzLzIwMjQvMDIvSGVyby1iZy1taW4ucG5nJykgY2VudGVyIHRvcCBuby1yZXBlYXQ7YmFja2dyb3VuZC1zaXplOmF1dG8sIGNvdmVyO3BhZGRpbmc6IDBweDttYXJnaW4tdG9wOiA0OHB4O21hcmdpbi1ib3R0b206IDQ4cHg7IH0gLnRiLWNvbnRhaW5lciAudGItY29udGFpbmVyLWlubmVye3dpZHRoOjEwMCU7bWFyZ2luOjAgYXV0b30gLndwLWJsb2NrLXRvb2xzZXQtYmxvY2tzLWNvbnRhaW5lci50Yi1jb250YWluZXJbZGF0YS10b29sc2V0LWJsb2Nrcy1jb250YWluZXI9IjU5OTAzOTA4YTkwZTFkYWJlODM1MmQ2ZGFiMmQ0YjhjIl0geyBib3JkZXItdG9wLWxlZnQtcmFkaXVzOiAyMHB4O2JvcmRlci10b3AtcmlnaHQtcmFkaXVzOiAyMHB4O2JhY2tncm91bmQ6IHVybCgnaHR0cHM6Ly9wdGMud3BtbC5vcmcvd3AtY29udGVudC91cGxvYWRzLzIwMjQvMDIvQm9yZGVyLW1pbi5wbmcnKSBjZW50ZXIgYm90dG9tIG5vLXJlcGVhdDtiYWNrZ3JvdW5kLXNpemU6Y29udGFpbjtwYWRkaW5nOiAwcHg7bWluLWhlaWdodDogMnB4O2Rpc3BsYXk6bXMtZmxleGJveCAhaW1wb3J0YW50O2Rpc3BsYXk6ZmxleCAhaW1wb3J0YW50Oy1tcy1mbGV4LWRpcmVjdGlvbjpjb2x1bW47ZmxleC1kaXJlY3Rpb246Y29sdW1uOy1tcy1mbGV4LXBhY2s6Y2VudGVyO2p1c3RpZnktY29udGVudDpjZW50ZXI7IH0gLnRiLWNvbnRhaW5lciAudGItY29udGFpbmVyLWlubmVye3dpZHRoOjEwMCU7bWFyZ2luOjAgYXV0b30gLndwLWJsb2NrLXRvb2xzZXQtYmxvY2tzLWNvbnRhaW5lci50Yi1jb250YWluZXJbZGF0YS10b29sc2V0LWJsb2Nrcy1jb250YWluZXI9IjE1NDA2Y2ViNzVmNTg4ZTBjMjdjYWZhY2MzZWVjZGY4Il0geyBwYWRkaW5nOiA0OHB4OyB9IC50Yi1idXR0b257Y29sb3I6I2YxZjFmMX0udGItYnV0dG9uLS1sZWZ0e3RleHQtYWxpZ246bGVmdH0udGItYnV0dG9uLS1jZW50ZXJ7dGV4dC1hbGlnbjpjZW50ZXJ9LnRiLWJ1dHRvbi0tcmlnaHR7dGV4dC1hbGlnbjpyaWdodH0udGItYnV0dG9uX19saW5re2NvbG9yOmluaGVyaXQ7Y3Vyc29yOnBvaW50ZXI7ZGlzcGxheTppbmxpbmUtYmxvY2s7bGluZS1oZWlnaHQ6MTAwJTt0ZXh0LWRlY29yYXRpb246bm9uZSAhaW1wb3J0YW50O3RleHQtYWxpZ246Y2VudGVyO3RyYW5zaXRpb246YWxsIDAuM3MgZWFzZX0udGItYnV0dG9uX19saW5rOmhvdmVyLC50Yi1idXR0b25fX2xpbms6Zm9jdXMsLnRiLWJ1dHRvbl9fbGluazp2aXNpdGVke2NvbG9yOmluaGVyaXR9LnRiLWJ1dHRvbl9fbGluazpob3ZlciAudGItYnV0dG9uX19jb250ZW50LC50Yi1idXR0b25fX2xpbms6Zm9jdXMgLnRiLWJ1dHRvbl9fY29udGVudCwudGItYnV0dG9uX19saW5rOnZpc2l0ZWQgLnRiLWJ1dHRvbl9fY29udGVudHtmb250LWZhbWlseTppbmhlcml0O2ZvbnQtc3R5bGU6aW5oZXJpdDtmb250LXdlaWdodDppbmhlcml0O2xldHRlci1zcGFjaW5nOmluaGVyaXQ7dGV4dC1kZWNvcmF0aW9uOmluaGVyaXQ7dGV4dC1zaGFkb3c6aW5oZXJpdDt0ZXh0LXRyYW5zZm9ybTppbmhlcml0fS50Yi1idXR0b25fX2NvbnRlbnR7dmVydGljYWwtYWxpZ246bWlkZGxlO3RyYW5zaXRpb246YWxsIDAuM3MgZWFzZX0udGItYnV0dG9uX19pY29ue3RyYW5zaXRpb246YWxsIDAuM3MgZWFzZTtkaXNwbGF5OmlubGluZS1ibG9jazt2ZXJ0aWNhbC1hbGlnbjptaWRkbGU7Zm9udC1zdHlsZTpub3JtYWwgIWltcG9ydGFudH0udGItYnV0dG9uX19pY29uOjpiZWZvcmV7Y29udGVudDphdHRyKGRhdGEtZm9udC1jb2RlKTtmb250LXdlaWdodDpub3JtYWwgIWltcG9ydGFudH0udGItYnV0dG9uX19saW5re2JhY2tncm91bmQtY29sb3I6IzQ0NDtib3JkZXItcmFkaXVzOjAuM2VtO2ZvbnQtc2l6ZToxLjNlbTttYXJnaW4tYm90dG9tOjAuNzZlbTtwYWRkaW5nOjAuNTVlbSAxLjVlbSAwLjU1ZW19IC50Yi1idXR0b25bZGF0YS10b29sc2V0LWJsb2Nrcy1idXR0b249ImRhODM5YTg1NGE3M2I4Y2QwNTAwY2ExNjJhNzQ3NGFhIl0geyB0ZXh0LWFsaWduOiBjZW50ZXI7IH0gLnRiLWJ1dHRvbltkYXRhLXRvb2xzZXQtYmxvY2tzLWJ1dHRvbj0iZGE4MzlhODU0YTczYjhjZDA1MDBjYTE2MmE3NDc0YWEiXSAudGItYnV0dG9uX19saW5rIHsgYmFja2dyb3VuZC1jb2xvcjogcmdiYSggMjEyLCAxODAsIDI1MywgMSApO2JvcmRlci1yYWRpdXM6IDEwcHg7Y29sb3I6IHJnYmEoIDIyLCAyNiwgMjcsIDEgKTtwYWRkaW5nOiAxNnB4IDMycHggMTZweCAzMnB4O21hcmdpbi10b3A6IDI0cHg7bWFyZ2luLWJvdHRvbTogMHB4O2ZvbnQtc2l6ZTogMTZweDtsaW5lLWhlaWdodDogMjRweDtmb250LWZhbWlseTogUG9wcGlucztmb250LXdlaWdodDogNTAwO2NvbG9yOiByZ2JhKCAyMiwgMjYsIDI3LCAxICk7IH0gLnRiLWJ1dHRvbltkYXRhLXRvb2xzZXQtYmxvY2tzLWJ1dHRvbj0iZGE4MzlhODU0YTczYjhjZDA1MDBjYTE2MmE3NDc0YWEiXSAudGItYnV0dG9uX19saW5rOmhvdmVyIHsgYmFja2dyb3VuZC1jb2xvcjogcmdiYSggMjU1LCAyNTUsIDI1NSwgMSApOyB9IC50Yi1idXR0b25bZGF0YS10b29sc2V0LWJsb2Nrcy1idXR0b249ImRhODM5YTg1NGE3M2I4Y2QwNTAwY2ExNjJhNzQ3NGFhIl0gLnRiLWJ1dHRvbl9faWNvbiB7IGZvbnQtZmFtaWx5OiBkYXNoaWNvbnM7IH0gLnRiLWhlYWRpbmdbZGF0YS10b29sc2V0LWJsb2Nrcy1oZWFkaW5nPSJlNzMwZTc0MWYxMDcwMDY0ODg5NTY1ZjA2ZWQ0NDc4NyJdICB7IGNvbG9yOiByZ2JhKCAyNTUsIDI1NSwgMjU1LCAxICk7dGV4dC1hbGlnbjogY2VudGVyO21hcmdpbi10b3A6IDBweDttYXJnaW4tYm90dG9tOiAxNnB4OyB9ICBoMy50Yi1oZWFkaW5nW2RhdGEtdG9vbHNldC1ibG9ja3MtaGVhZGluZz0iNzU5YjYxZDViNjE3ODFhNDVjY2ViNTkzN2ZmODJkNDMiXSAgeyBjb2xvcjogcmdiYSggMjU1LCAyNTUsIDI1NSwgMSApO3RleHQtYWxpZ246IGNlbnRlcjttYXJnaW4tdG9wOiAwcHg7bWFyZ2luLWJvdHRvbTogMTZweDsgfSAgLnRiLWNvbnRhaW5lciAudGItY29udGFpbmVyLWlubmVye3dpZHRoOjEwMCU7bWFyZ2luOjAgYXV0b30gLndwLWJsb2NrLXRvb2xzZXQtYmxvY2tzLWNvbnRhaW5lci50Yi1jb250YWluZXJbZGF0YS10b29sc2V0LWJsb2Nrcy1jb250YWluZXI9ImYxYzUyNTQ4MmQ2NGEwMjJhODRjODU0OWRmMGU3MWU3Il0geyBib3JkZXItdG9wLWxlZnQtcmFkaXVzOiAyMHB4O2JvcmRlci10b3AtcmlnaHQtcmFkaXVzOiAyMHB4O2JhY2tncm91bmQ6IHVybCgnaHR0cHM6Ly9wdGMud3BtbC5vcmcvd3AtY29udGVudC91cGxvYWRzLzIwMjQvMDIvQm9yZGVyLW1pbi5wbmcnKSBjZW50ZXIgdG9wIG5vLXJlcGVhdDtiYWNrZ3JvdW5kLXNpemU6Y29udGFpbjtwYWRkaW5nOiAwcHg7bWluLWhlaWdodDogMnB4O2Rpc3BsYXk6bXMtZmxleGJveCAhaW1wb3J0YW50O2Rpc3BsYXk6ZmxleCAhaW1wb3J0YW50Oy1tcy1mbGV4LWRpcmVjdGlvbjpjb2x1bW47ZmxleC1kaXJlY3Rpb246Y29sdW1uOy1tcy1mbGV4LXBhY2s6Y2VudGVyO2p1c3RpZnktY29udGVudDpjZW50ZXI7IH0gLnRiLWNvbnRhaW5lciAudGItY29udGFpbmVyLWlubmVye3dpZHRoOjEwMCU7bWFyZ2luOjAgYXV0b30gLndwLWJsb2NrLXRvb2xzZXQtYmxvY2tzLWNvbnRhaW5lci50Yi1jb250YWluZXJbZGF0YS10b29sc2V0LWJsb2Nrcy1jb250YWluZXI9ImIxZDcxMTA3NDIzZWRjYWVjYjQwYTFiMTBiZDc0YzU1Il0geyBib3JkZXItcmFkaXVzOiAyMHB4O3BhZGRpbmc6IDQwcHggMHB4IDQwcHggMHB4O21hcmdpbi10b3A6IDQ4cHg7Ym9yZGVyOiAxcHggc29saWQgcmdiYSggMjA1LCAxODksIDIyNiwgMC4yICk7IH0gLnRiLWNvbnRhaW5lciAudGItY29udGFpbmVyLWlubmVye3dpZHRoOjEwMCU7bWFyZ2luOjAgYXV0b30gLndwLWJsb2NrLXRvb2xzZXQtYmxvY2tzLWNvbnRhaW5lci50Yi1jb250YWluZXJbZGF0YS10b29sc2V0LWJsb2Nrcy1jb250YWluZXI9ImVhZDhlYzdhN2VhMDMyMTg0ZDgyN2E5ZTU3ZWNiNWEzIl0geyBiYWNrZ3JvdW5kOiB1cmwoJ2h0dHBzOi8vcHRjLndwbWwub3JnL3dwLWNvbnRlbnQvdXBsb2Fkcy8yMDI0LzA1L290Z3MtaWNvLW1lcmdlLnN2ZycpIGxlZnQgY2VudGVyIG5vLXJlcGVhdDtiYWNrZ3JvdW5kLXNpemU6IDI0cHggYXV0bzttaW4taGVpZ2h0OiAyNHB4O2Rpc3BsYXk6bXMtZmxleGJveCAhaW1wb3J0YW50O2Rpc3BsYXk6ZmxleCAhaW1wb3J0YW50Oy1tcy1mbGV4LWRpcmVjdGlvbjpjb2x1bW47ZmxleC1kaXJlY3Rpb246Y29sdW1uOy1tcy1mbGV4LXBhY2s6Y2VudGVyO2p1c3RpZnktY29udGVudDpjZW50ZXI7IH0gLnRiLWNvbnRhaW5lciAudGItY29udGFpbmVyLWlubmVye3dpZHRoOjEwMCU7bWFyZ2luOjAgYXV0b30gLndwLWJsb2NrLXRvb2xzZXQtYmxvY2tzLWNvbnRhaW5lci50Yi1jb250YWluZXJbZGF0YS10b29sc2V0LWJsb2Nrcy1jb250YWluZXI9ImM4ZWYwODM1NTNjMzc2MjA5MGY2MWQ2MzEzYmE3OGNiIl0geyBwYWRkaW5nOiAwcHggNDBweCAzMnB4IDQwcHg7bWFyZ2luLXRvcDogMzJweDtib3JkZXItYm90dG9tOiAxcHggc29saWQgcmdiYSggMjA1LCAxODksIDIyNiwgMC4yICk7IH0gLnRiLWdyaWQsLnRiLWdyaWQ+LmJsb2NrLWVkaXRvci1pbm5lci1ibG9ja3M+LmJsb2NrLWVkaXRvci1ibG9jay1saXN0X19sYXlvdXR7ZGlzcGxheTpncmlkO2dyaWQtcm93LWdhcDoyNXB4O2dyaWQtY29sdW1uLWdhcDoyNXB4fS50Yi1ncmlkLWl0ZW17YmFja2dyb3VuZDojZDM4YTAzO3BhZGRpbmc6MzBweH0udGItZ3JpZC1jb2x1bW57ZmxleC13cmFwOndyYXB9LnRiLWdyaWQtY29sdW1uPip7d2lkdGg6MTAwJX0udGItZ3JpZC1jb2x1bW4udGItZ3JpZC1hbGlnbi10b3B7d2lkdGg6MTAwJTtkaXNwbGF5OmZsZXg7YWxpZ24tY29udGVudDpmbGV4LXN0YXJ0fS50Yi1ncmlkLWNvbHVtbi50Yi1ncmlkLWFsaWduLWNlbnRlcnt3aWR0aDoxMDAlO2Rpc3BsYXk6ZmxleDthbGlnbi1jb250ZW50OmNlbnRlcn0udGItZ3JpZC1jb2x1bW4udGItZ3JpZC1hbGlnbi1ib3R0b217d2lkdGg6MTAwJTtkaXNwbGF5OmZsZXg7YWxpZ24tY29udGVudDpmbGV4LWVuZH0gLndwLWJsb2NrLXRvb2xzZXQtYmxvY2tzLWdyaWQudGItZ3JpZFtkYXRhLXRvb2xzZXQtYmxvY2tzLWdyaWQ9ImQwZDdhZDJmYzQ0NGZjMTUxYTAwYzUwYTQzNGI4YWNlIl0geyBncmlkLXRlbXBsYXRlLWNvbHVtbnM6IG1pbm1heCgwLCAwLjA0NWZyKSBtaW5tYXgoMCwgMC45NTVmcik7Z3JpZC1jb2x1bW4tZ2FwOiAxNnB4O2dyaWQtYXV0by1mbG93OiByb3cgfSAud3AtYmxvY2stdG9vbHNldC1ibG9ja3MtZ3JpZC50Yi1ncmlkW2RhdGEtdG9vbHNldC1ibG9ja3MtZ3JpZD0iZDBkN2FkMmZjNDQ0ZmMxNTFhMDBjNTBhNDM0YjhhY2UiXSA+IC50Yi1ncmlkLWNvbHVtbjpudGgtb2YtdHlwZSgybiArIDEpIHsgZ3JpZC1jb2x1bW46IDEgfSAud3AtYmxvY2stdG9vbHNldC1ibG9ja3MtZ3JpZC50Yi1ncmlkW2RhdGEtdG9vbHNldC1ibG9ja3MtZ3JpZD0iZDBkN2FkMmZjNDQ0ZmMxNTFhMDBjNTBhNDM0YjhhY2UiXSA+IC50Yi1ncmlkLWNvbHVtbjpudGgtb2YtdHlwZSgybiArIDIpIHsgZ3JpZC1jb2x1bW46IDIgfSAudGItY29udGFpbmVyIC50Yi1jb250YWluZXItaW5uZXJ7d2lkdGg6MTAwJTttYXJnaW46MCBhdXRvfSAud3AtYmxvY2stdG9vbHNldC1ibG9ja3MtY29udGFpbmVyLnRiLWNvbnRhaW5lcltkYXRhLXRvb2xzZXQtYmxvY2tzLWNvbnRhaW5lcj0iNGYxNDQ2ZGM1MTY1NGY3NjVmOGJkNGFiNTY1MTk5OWIiXSB7IGJhY2tncm91bmQ6IHVybCgnaHR0cHM6Ly9wdGMud3BtbC5vcmcvd3AtY29udGVudC91cGxvYWRzLzIwMjQvMDIvbGlnaHRuaW5nLnN2ZycpIGxlZnQgY2VudGVyIG5vLXJlcGVhdDtiYWNrZ3JvdW5kLXNpemU6IDI0cHggYXV0bzttaW4taGVpZ2h0OiAyNHB4O2Rpc3BsYXk6bXMtZmxleGJveCAhaW1wb3J0YW50O2Rpc3BsYXk6ZmxleCAhaW1wb3J0YW50Oy1tcy1mbGV4LWRpcmVjdGlvbjpjb2x1bW47ZmxleC1kaXJlY3Rpb246Y29sdW1uOy1tcy1mbGV4LXBhY2s6Y2VudGVyO2p1c3RpZnktY29udGVudDpjZW50ZXI7IH0gLnRiLWNvbnRhaW5lciAudGItY29udGFpbmVyLWlubmVye3dpZHRoOjEwMCU7bWFyZ2luOjAgYXV0b30gLndwLWJsb2NrLXRvb2xzZXQtYmxvY2tzLWNvbnRhaW5lci50Yi1jb250YWluZXJbZGF0YS10b29sc2V0LWJsb2Nrcy1jb250YWluZXI9IjBlMThmYjUzMWM1ODAzYzVjOWE2OTg5MDVjYjIzMDhhIl0geyBwYWRkaW5nOiAwcHggNDBweCAzMnB4IDQwcHg7Ym9yZGVyLWJvdHRvbTogMXB4IHNvbGlkIHJnYmEoIDIwNSwgMTg5LCAyMjYsIDAuMiApOyB9IC50Yi1ncmlkLC50Yi1ncmlkPi5ibG9jay1lZGl0b3ItaW5uZXItYmxvY2tzPi5ibG9jay1lZGl0b3ItYmxvY2stbGlzdF9fbGF5b3V0e2Rpc3BsYXk6Z3JpZDtncmlkLXJvdy1nYXA6MjVweDtncmlkLWNvbHVtbi1nYXA6MjVweH0udGItZ3JpZC1pdGVte2JhY2tncm91bmQ6I2QzOGEwMztwYWRkaW5nOjMwcHh9LnRiLWdyaWQtY29sdW1ue2ZsZXgtd3JhcDp3cmFwfS50Yi1ncmlkLWNvbHVtbj4qe3dpZHRoOjEwMCV9LnRiLWdyaWQtY29sdW1uLnRiLWdyaWQtYWxpZ24tdG9we3dpZHRoOjEwMCU7ZGlzcGxheTpmbGV4O2FsaWduLWNvbnRlbnQ6ZmxleC1zdGFydH0udGItZ3JpZC1jb2x1bW4udGItZ3JpZC1hbGlnbi1jZW50ZXJ7d2lkdGg6MTAwJTtkaXNwbGF5OmZsZXg7YWxpZ24tY29udGVudDpjZW50ZXJ9LnRiLWdyaWQtY29sdW1uLnRiLWdyaWQtYWxpZ24tYm90dG9te3dpZHRoOjEwMCU7ZGlzcGxheTpmbGV4O2FsaWduLWNvbnRlbnQ6ZmxleC1lbmR9IC53cC1ibG9jay10b29sc2V0LWJsb2Nrcy1ncmlkLnRiLWdyaWRbZGF0YS10b29sc2V0LWJsb2Nrcy1ncmlkPSJkZjdjODQzZjU1NTI3NmRhYzUwODU5NTNmMzYxMjhjOCJdIHsgZ3JpZC10ZW1wbGF0ZS1jb2x1bW5zOiBtaW5tYXgoMCwgMC4wNDVmcikgbWlubWF4KDAsIDAuOTU1ZnIpO2dyaWQtY29sdW1uLWdhcDogMTZweDtncmlkLWF1dG8tZmxvdzogcm93IH0gLndwLWJsb2NrLXRvb2xzZXQtYmxvY2tzLWdyaWQudGItZ3JpZFtkYXRhLXRvb2xzZXQtYmxvY2tzLWdyaWQ9ImRmN2M4NDNmNTU1Mjc2ZGFjNTA4NTk1M2YzNjEyOGM4Il0gPiAudGItZ3JpZC1jb2x1bW46bnRoLW9mLXR5cGUoMm4gKyAxKSB7IGdyaWQtY29sdW1uOiAxIH0gLndwLWJsb2NrLXRvb2xzZXQtYmxvY2tzLWdyaWQudGItZ3JpZFtkYXRhLXRvb2xzZXQtYmxvY2tzLWdyaWQ9ImRmN2M4NDNmNTU1Mjc2ZGFjNTA4NTk1M2YzNjEyOGM4Il0gPiAudGItZ3JpZC1jb2x1bW46bnRoLW9mLXR5cGUoMm4gKyAyKSB7IGdyaWQtY29sdW1uOiAyIH0gLnRiLWhlYWRpbmdbZGF0YS10b29sc2V0LWJsb2Nrcy1oZWFkaW5nPSJjZWVmNjllYTdjNjRlZmMxNTY1YmViNDk3ZTJhYWZhYyJdICB7IHBhZGRpbmctdG9wOiAwcHg7cGFkZGluZy1ib3R0b206IDBweDttYXJnaW4tdG9wOiAwcHg7bWFyZ2luLWJvdHRvbTogMHB4OyB9ICAudGItaGVhZGluZ1tkYXRhLXRvb2xzZXQtYmxvY2tzLWhlYWRpbmc9IjYxZDE1NTlhNmM4YjY3YjE2OTY3NTFiNjZmYjUzZTQ2Il0gIHsgZm9udC1zaXplOiAxOHB4O2ZvbnQtZmFtaWx5OiBQb3BwaW5zO2ZvbnQtd2VpZ2h0OiA1MDA7Y29sb3I6IHJnYmEoIDI1NSwgMjU1LCAyNTUsIDEgKTtwYWRkaW5nLXRvcDogMHB4O3BhZGRpbmctYm90dG9tOiAwcHg7bWFyZ2luLXRvcDogMHB4O21hcmdpbi1ib3R0b206IDEycHg7IH0gIC53cC1ibG9jay10b29sc2V0LWJsb2Nrcy1ncmlkLWNvbHVtbi50Yi1ncmlkLWNvbHVtbltkYXRhLXRvb2xzZXQtYmxvY2tzLWdyaWQtY29sdW1uPSJlOGU5MmU1MWYyMWU4OTQ0MzdkMzAzYTczY2QyOTQ5YyJdIHsgcGFkZGluZy10b3A6IDRweDtkaXNwbGF5OiBmbGV4OyB9IC50Yi1jb250YWluZXIgLnRiLWNvbnRhaW5lci1pbm5lcnt3aWR0aDoxMDAlO21hcmdpbjowIGF1dG99IC53cC1ibG9jay10b29sc2V0LWJsb2Nrcy1jb250YWluZXIudGItY29udGFpbmVyW2RhdGEtdG9vbHNldC1ibG9ja3MtY29udGFpbmVyPSIwNzliM2FmNmVhZmEwNjRlZjcwYjRkZWViOThiZmQyMSJdIHsgYmFja2dyb3VuZDogdXJsKCdodHRwczovL3B0Yy53cG1sLm9yZy93cC1jb250ZW50L3VwbG9hZHMvMjAyNC8wMi9yZWZyZXNoLnN2ZycpIGxlZnQgY2VudGVyIG5vLXJlcGVhdDtiYWNrZ3JvdW5kLXNpemU6IDI0cHggYXV0bzttaW4taGVpZ2h0OiAyNHB4O2Rpc3BsYXk6bXMtZmxleGJveCAhaW1wb3J0YW50O2Rpc3BsYXk6ZmxleCAhaW1wb3J0YW50Oy1tcy1mbGV4LWRpcmVjdGlvbjpjb2x1bW47ZmxleC1kaXJlY3Rpb246Y29sdW1uOy1tcy1mbGV4LXBhY2s6Y2VudGVyO2p1c3RpZnktY29udGVudDpjZW50ZXI7IH0gLnRiLWNvbnRhaW5lciAudGItY29udGFpbmVyLWlubmVye3dpZHRoOjEwMCU7bWFyZ2luOjAgYXV0b30gLndwLWJsb2NrLXRvb2xzZXQtYmxvY2tzLWNvbnRhaW5lci50Yi1jb250YWluZXJbZGF0YS10b29sc2V0LWJsb2Nrcy1jb250YWluZXI9Ijg4YTQwMGNhOGNkM2M2YmI0ZmQyNmFiYjE3NTJjODc1Il0geyBib3JkZXItcmFkaXVzOiAxMHB4O3BhZGRpbmc6IDI0cHg7bWFyZ2luLXRvcDogMzJweDttYXJnaW4tYm90dG9tOiAzMnB4O2JvcmRlcjogMXB4IHNvbGlkIHJnYmEoIDIxMiwgMTgwLCAyNTMsIDEgKTsgfSAudGItZ3JpZCwudGItZ3JpZD4uYmxvY2stZWRpdG9yLWlubmVyLWJsb2Nrcz4uYmxvY2stZWRpdG9yLWJsb2NrLWxpc3RfX2xheW91dHtkaXNwbGF5OmdyaWQ7Z3JpZC1yb3ctZ2FwOjI1cHg7Z3JpZC1jb2x1bW4tZ2FwOjI1cHh9LnRiLWdyaWQtaXRlbXtiYWNrZ3JvdW5kOiNkMzhhMDM7cGFkZGluZzozMHB4fS50Yi1ncmlkLWNvbHVtbntmbGV4LXdyYXA6d3JhcH0udGItZ3JpZC1jb2x1bW4+Knt3aWR0aDoxMDAlfS50Yi1ncmlkLWNvbHVtbi50Yi1ncmlkLWFsaWduLXRvcHt3aWR0aDoxMDAlO2Rpc3BsYXk6ZmxleDthbGlnbi1jb250ZW50OmZsZXgtc3RhcnR9LnRiLWdyaWQtY29sdW1uLnRiLWdyaWQtYWxpZ24tY2VudGVye3dpZHRoOjEwMCU7ZGlzcGxheTpmbGV4O2FsaWduLWNvbnRlbnQ6Y2VudGVyfS50Yi1ncmlkLWNvbHVtbi50Yi1ncmlkLWFsaWduLWJvdHRvbXt3aWR0aDoxMDAlO2Rpc3BsYXk6ZmxleDthbGlnbi1jb250ZW50OmZsZXgtZW5kfSAud3AtYmxvY2stdG9vbHNldC1ibG9ja3MtZ3JpZC50Yi1ncmlkW2RhdGEtdG9vbHNldC1ibG9ja3MtZ3JpZD0iMzdkMTk0MTc5ODFiMWI5NzkyMGRmNTZjMDg4ODQwYTYiXSB7IGdyaWQtdGVtcGxhdGUtY29sdW1uczogbWlubWF4KDAsIDAuMDM1ZnIpIG1pbm1heCgwLCAwLjk2NWZyKTtncmlkLWNvbHVtbi1nYXA6IDEwcHg7Z3JpZC1hdXRvLWZsb3c6IHJvdyB9IC53cC1ibG9jay10b29sc2V0LWJsb2Nrcy1ncmlkLnRiLWdyaWRbZGF0YS10b29sc2V0LWJsb2Nrcy1ncmlkPSIzN2QxOTQxNzk4MWIxYjk3OTIwZGY1NmMwODg4NDBhNiJdID4gLnRiLWdyaWQtY29sdW1uOm50aC1vZi10eXBlKDJuICsgMSkgeyBncmlkLWNvbHVtbjogMSB9IC53cC1ibG9jay10b29sc2V0LWJsb2Nrcy1ncmlkLnRiLWdyaWRbZGF0YS10b29sc2V0LWJsb2Nrcy1ncmlkPSIzN2QxOTQxNzk4MWIxYjk3OTIwZGY1NmMwODg4NDBhNiJdID4gLnRiLWdyaWQtY29sdW1uOm50aC1vZi10eXBlKDJuICsgMikgeyBncmlkLWNvbHVtbjogMiB9IC53cC1ibG9jay10b29sc2V0LWJsb2Nrcy1ncmlkLWNvbHVtbi50Yi1ncmlkLWNvbHVtbltkYXRhLXRvb2xzZXQtYmxvY2tzLWdyaWQtY29sdW1uPSJmNTg2ZmY3YmZlMWQ3MzE3YzYzMTYyZWM3YjcwMzllZCJdIHsgZGlzcGxheTogZmxleDsgfSAudGItaGVhZGluZ1tkYXRhLXRvb2xzZXQtYmxvY2tzLWhlYWRpbmc9ImFkZWYwZDQzOWRjMTg1ZDkwNTIyNDJlOTMwZGYxNDY3Il0gIHsgcGFkZGluZy10b3A6IDBweDtwYWRkaW5nLWJvdHRvbTogMHB4O21hcmdpbi10b3A6IDBweDttYXJnaW4tYm90dG9tOiAwcHg7IH0gIC53cC1ibG9jay10b29sc2V0LWJsb2Nrcy1ncmlkLWNvbHVtbi50Yi1ncmlkLWNvbHVtbltkYXRhLXRvb2xzZXQtYmxvY2tzLWdyaWQtY29sdW1uPSJhNmU3M2M5YmNmYjY1NzQ2NjdiZDMwNDNjZDFlOGQ5ZCJdIHsgZGlzcGxheTogZmxleDsgfSAudGItY29udGFpbmVyIC50Yi1jb250YWluZXItaW5uZXJ7d2lkdGg6MTAwJTttYXJnaW46MCBhdXRvfSAud3AtYmxvY2stdG9vbHNldC1ibG9ja3MtY29udGFpbmVyLnRiLWNvbnRhaW5lcltkYXRhLXRvb2xzZXQtYmxvY2tzLWNvbnRhaW5lcj0iZTI4MDZjZDYwYTk3ZjQ0OWI0NDBiZjVkNmQxMmY5YmIiXSB7IGJhY2tncm91bmQ6IHVybCgnaHR0cHM6Ly9wdGMud3BtbC5vcmcvd3AtY29udGVudC91cGxvYWRzLzIwMjQvMTAvb3Rncy1pY28tY29tbWl0LTEuc3ZnJykgbGVmdCBjZW50ZXIgbm8tcmVwZWF0O2JhY2tncm91bmQtc2l6ZTogMjBweCAyMHB4O21pbi1oZWlnaHQ6IDIwcHg7IH0gLnRiLWltYWdle3Bvc2l0aW9uOnJlbGF0aXZlO3RyYW5zaXRpb246dHJhbnNmb3JtIDAuMjVzIGVhc2V9LndwLWJsb2NrLWltYWdlIC50Yi1pbWFnZS5hbGlnbmNlbnRlcnttYXJnaW4tbGVmdDphdXRvO21hcmdpbi1yaWdodDphdXRvfS50Yi1pbWFnZSBpbWd7bWF4LXdpZHRoOjEwMCU7aGVpZ2h0OmF1dG87d2lkdGg6YXV0bzt0cmFuc2l0aW9uOnRyYW5zZm9ybSAwLjI1cyBlYXNlfS50Yi1pbWFnZSAudGItaW1hZ2UtY2FwdGlvbi1maXQtdG8taW1hZ2V7ZGlzcGxheTp0YWJsZX0udGItaW1hZ2UgLnRiLWltYWdlLWNhcHRpb24tZml0LXRvLWltYWdlIC50Yi1pbWFnZS1jYXB0aW9ue2Rpc3BsYXk6dGFibGUtY2FwdGlvbjtjYXB0aW9uLXNpZGU6Ym90dG9tfSAudGItaW1hZ2VbZGF0YS10b29sc2V0LWJsb2Nrcy1pbWFnZT0iNzFiMGJmN2Q2ODIyYzg1ODk2YWM0MDZhNGVkZWFkN2YiXSB7IG1heC13aWR0aDogMTAwJTsgfSAudGItaW1hZ2VbZGF0YS10b29sc2V0LWJsb2Nrcy1pbWFnZT0iNzFiMGJmN2Q2ODIyYzg1ODk2YWM0MDZhNGVkZWFkN2YiXSBpbWcgeyBib3JkZXItcmFkaXVzOiAxMHB4O2JvcmRlcjogMXB4IHNvbGlkIHJnYmEoIDIyMiwgMjIyLCAyMjIsIDEgKTsgfSAudGItaW1hZ2VbZGF0YS10b29sc2V0LWJsb2Nrcy1pbWFnZT0iNzFiMGJmN2Q2ODIyYzg1ODk2YWM0MDZhNGVkZWFkN2YiXTpob3ZlciBpbWcgeyB0cmFuc2Zvcm06IHNjYWxlKDEuMDIpOyB9IEBtZWRpYSBvbmx5IHNjcmVlbiBhbmQgKG1heC13aWR0aDogNzgxcHgpIHsgLnRiLWNvbnRhaW5lciAudGItY29udGFpbmVyLWlubmVye3dpZHRoOjEwMCU7bWFyZ2luOjAgYXV0b30udGItY29udGFpbmVyIC50Yi1jb250YWluZXItaW5uZXJ7d2lkdGg6MTAwJTttYXJnaW46MCBhdXRvfS50Yi1jb250YWluZXIgLnRiLWNvbnRhaW5lci1pbm5lcnt3aWR0aDoxMDAlO21hcmdpbjowIGF1dG99LnRiLWJ1dHRvbntjb2xvcjojZjFmMWYxfS50Yi1idXR0b24tLWxlZnR7dGV4dC1hbGlnbjpsZWZ0fS50Yi1idXR0b24tLWNlbnRlcnt0ZXh0LWFsaWduOmNlbnRlcn0udGItYnV0dG9uLS1yaWdodHt0ZXh0LWFsaWduOnJpZ2h0fS50Yi1idXR0b25fX2xpbmt7Y29sb3I6aW5oZXJpdDtjdXJzb3I6cG9pbnRlcjtkaXNwbGF5OmlubGluZS1ibG9jaztsaW5lLWhlaWdodDoxMDAlO3RleHQtZGVjb3JhdGlvbjpub25lICFpbXBvcnRhbnQ7dGV4dC1hbGlnbjpjZW50ZXI7dHJhbnNpdGlvbjphbGwgMC4zcyBlYXNlfS50Yi1idXR0b25fX2xpbms6aG92ZXIsLnRiLWJ1dHRvbl9fbGluazpmb2N1cywudGItYnV0dG9uX19saW5rOnZpc2l0ZWR7Y29sb3I6aW5oZXJpdH0udGItYnV0dG9uX19saW5rOmhvdmVyIC50Yi1idXR0b25fX2NvbnRlbnQsLnRiLWJ1dHRvbl9fbGluazpmb2N1cyAudGItYnV0dG9uX19jb250ZW50LC50Yi1idXR0b25fX2xpbms6dmlzaXRlZCAudGItYnV0dG9uX19jb250ZW50e2ZvbnQtZmFtaWx5OmluaGVyaXQ7Zm9udC1zdHlsZTppbmhlcml0O2ZvbnQtd2VpZ2h0OmluaGVyaXQ7bGV0dGVyLXNwYWNpbmc6aW5oZXJpdDt0ZXh0LWRlY29yYXRpb246aW5oZXJpdDt0ZXh0LXNoYWRvdzppbmhlcml0O3RleHQtdHJhbnNmb3JtOmluaGVyaXR9LnRiLWJ1dHRvbl9fY29udGVudHt2ZXJ0aWNhbC1hbGlnbjptaWRkbGU7dHJhbnNpdGlvbjphbGwgMC4zcyBlYXNlfS50Yi1idXR0b25fX2ljb257dHJhbnNpdGlvbjphbGwgMC4zcyBlYXNlO2Rpc3BsYXk6aW5saW5lLWJsb2NrO3ZlcnRpY2FsLWFsaWduOm1pZGRsZTtmb250LXN0eWxlOm5vcm1hbCAhaW1wb3J0YW50fS50Yi1idXR0b25fX2ljb246OmJlZm9yZXtjb250ZW50OmF0dHIoZGF0YS1mb250LWNvZGUpO2ZvbnQtd2VpZ2h0Om5vcm1hbCAhaW1wb3J0YW50fS50Yi1idXR0b25fX2xpbmt7YmFja2dyb3VuZC1jb2xvcjojNDQ0O2JvcmRlci1yYWRpdXM6MC4zZW07Zm9udC1zaXplOjEuM2VtO21hcmdpbi1ib3R0b206MC43NmVtO3BhZGRpbmc6MC41NWVtIDEuNWVtIDAuNTVlbX0gIC50Yi1jb250YWluZXIgLnRiLWNvbnRhaW5lci1pbm5lcnt3aWR0aDoxMDAlO21hcmdpbjowIGF1dG99LnRiLWNvbnRhaW5lciAudGItY29udGFpbmVyLWlubmVye3dpZHRoOjEwMCU7bWFyZ2luOjAgYXV0b30udGItY29udGFpbmVyIC50Yi1jb250YWluZXItaW5uZXJ7d2lkdGg6MTAwJTttYXJnaW46MCBhdXRvfS50Yi1jb250YWluZXIgLnRiLWNvbnRhaW5lci1pbm5lcnt3aWR0aDoxMDAlO21hcmdpbjowIGF1dG99LnRiLWdyaWQsLnRiLWdyaWQ+LmJsb2NrLWVkaXRvci1pbm5lci1ibG9ja3M+LmJsb2NrLWVkaXRvci1ibG9jay1saXN0X19sYXlvdXR7ZGlzcGxheTpncmlkO2dyaWQtcm93LWdhcDoyNXB4O2dyaWQtY29sdW1uLWdhcDoyNXB4fS50Yi1ncmlkLWl0ZW17YmFja2dyb3VuZDojZDM4YTAzO3BhZGRpbmc6MzBweH0udGItZ3JpZC1jb2x1bW57ZmxleC13cmFwOndyYXB9LnRiLWdyaWQtY29sdW1uPip7d2lkdGg6MTAwJX0udGItZ3JpZC1jb2x1bW4udGItZ3JpZC1hbGlnbi10b3B7d2lkdGg6MTAwJTtkaXNwbGF5OmZsZXg7YWxpZ24tY29udGVudDpmbGV4LXN0YXJ0fS50Yi1ncmlkLWNvbHVtbi50Yi1ncmlkLWFsaWduLWNlbnRlcnt3aWR0aDoxMDAlO2Rpc3BsYXk6ZmxleDthbGlnbi1jb250ZW50OmNlbnRlcn0udGItZ3JpZC1jb2x1bW4udGItZ3JpZC1hbGlnbi1ib3R0b217d2lkdGg6MTAwJTtkaXNwbGF5OmZsZXg7YWxpZ24tY29udGVudDpmbGV4LWVuZH0gLndwLWJsb2NrLXRvb2xzZXQtYmxvY2tzLWdyaWQudGItZ3JpZFtkYXRhLXRvb2xzZXQtYmxvY2tzLWdyaWQ9ImQwZDdhZDJmYzQ0NGZjMTUxYTAwYzUwYTQzNGI4YWNlIl0geyBncmlkLXRlbXBsYXRlLWNvbHVtbnM6IG1pbm1heCgwLCAwLjA0ZnIpIG1pbm1heCgwLCAwLjk2ZnIpO2dyaWQtYXV0by1mbG93OiByb3cgfSAud3AtYmxvY2stdG9vbHNldC1ibG9ja3MtZ3JpZC50Yi1ncmlkW2RhdGEtdG9vbHNldC1ibG9ja3MtZ3JpZD0iZDBkN2FkMmZjNDQ0ZmMxNTFhMDBjNTBhNDM0YjhhY2UiXSA+IC50Yi1ncmlkLWNvbHVtbjpudGgtb2YtdHlwZSgybiArIDEpIHsgZ3JpZC1jb2x1bW46IDEgfSAud3AtYmxvY2stdG9vbHNldC1ibG9ja3MtZ3JpZC50Yi1ncmlkW2RhdGEtdG9vbHNldC1ibG9ja3MtZ3JpZD0iZDBkN2FkMmZjNDQ0ZmMxNTFhMDBjNTBhNDM0YjhhY2UiXSA+IC50Yi1ncmlkLWNvbHVtbjpudGgtb2YtdHlwZSgybiArIDIpIHsgZ3JpZC1jb2x1bW46IDIgfSAudGItY29udGFpbmVyIC50Yi1jb250YWluZXItaW5uZXJ7d2lkdGg6MTAwJTttYXJnaW46MCBhdXRvfS50Yi1jb250YWluZXIgLnRiLWNvbnRhaW5lci1pbm5lcnt3aWR0aDoxMDAlO21hcmdpbjowIGF1dG99LnRiLWdyaWQsLnRiLWdyaWQ+LmJsb2NrLWVkaXRvci1pbm5lci1ibG9ja3M+LmJsb2NrLWVkaXRvci1ibG9jay1saXN0X19sYXlvdXR7ZGlzcGxheTpncmlkO2dyaWQtcm93LWdhcDoyNXB4O2dyaWQtY29sdW1uLWdhcDoyNXB4fS50Yi1ncmlkLWl0ZW17YmFja2dyb3VuZDojZDM4YTAzO3BhZGRpbmc6MzBweH0udGItZ3JpZC1jb2x1bW57ZmxleC13cmFwOndyYXB9LnRiLWdyaWQtY29sdW1uPip7d2lkdGg6MTAwJX0udGItZ3JpZC1jb2x1bW4udGItZ3JpZC1hbGlnbi10b3B7d2lkdGg6MTAwJTtkaXNwbGF5OmZsZXg7YWxpZ24tY29udGVudDpmbGV4LXN0YXJ0fS50Yi1ncmlkLWNvbHVtbi50Yi1ncmlkLWFsaWduLWNlbnRlcnt3aWR0aDoxMDAlO2Rpc3BsYXk6ZmxleDthbGlnbi1jb250ZW50OmNlbnRlcn0udGItZ3JpZC1jb2x1bW4udGItZ3JpZC1hbGlnbi1ib3R0b217d2lkdGg6MTAwJTtkaXNwbGF5OmZsZXg7YWxpZ24tY29udGVudDpmbGV4LWVuZH0gLndwLWJsb2NrLXRvb2xzZXQtYmxvY2tzLWdyaWQudGItZ3JpZFtkYXRhLXRvb2xzZXQtYmxvY2tzLWdyaWQ9ImRmN2M4NDNmNTU1Mjc2ZGFjNTA4NTk1M2YzNjEyOGM4Il0geyBncmlkLXRlbXBsYXRlLWNvbHVtbnM6IG1pbm1heCgwLCAwLjA0ZnIpIG1pbm1heCgwLCAwLjk2ZnIpO2dyaWQtYXV0by1mbG93OiByb3cgfSAud3AtYmxvY2stdG9vbHNldC1ibG9ja3MtZ3JpZC50Yi1ncmlkW2RhdGEtdG9vbHNldC1ibG9ja3MtZ3JpZD0iZGY3Yzg0M2Y1NTUyNzZkYWM1MDg1OTUzZjM2MTI4YzgiXSA+IC50Yi1ncmlkLWNvbHVtbjpudGgtb2YtdHlwZSgybiArIDEpIHsgZ3JpZC1jb2x1bW46IDEgfSAud3AtYmxvY2stdG9vbHNldC1ibG9ja3MtZ3JpZC50Yi1ncmlkW2RhdGEtdG9vbHNldC1ibG9ja3MtZ3JpZD0iZGY3Yzg0M2Y1NTUyNzZkYWM1MDg1OTUzZjM2MTI4YzgiXSA+IC50Yi1ncmlkLWNvbHVtbjpudGgtb2YtdHlwZSgybiArIDIpIHsgZ3JpZC1jb2x1bW46IDIgfSAgIC53cC1ibG9jay10b29sc2V0LWJsb2Nrcy1ncmlkLWNvbHVtbi50Yi1ncmlkLWNvbHVtbltkYXRhLXRvb2xzZXQtYmxvY2tzLWdyaWQtY29sdW1uPSJlOGU5MmU1MWYyMWU4OTQ0MzdkMzAzYTczY2QyOTQ5YyJdIHsgZGlzcGxheTogZmxleDsgfSAudGItY29udGFpbmVyIC50Yi1jb250YWluZXItaW5uZXJ7d2lkdGg6MTAwJTttYXJnaW46MCBhdXRvfS50Yi1jb250YWluZXIgLnRiLWNvbnRhaW5lci1pbm5lcnt3aWR0aDoxMDAlO21hcmdpbjowIGF1dG99LnRiLWdyaWQsLnRiLWdyaWQ+LmJsb2NrLWVkaXRvci1pbm5lci1ibG9ja3M+LmJsb2NrLWVkaXRvci1ibG9jay1saXN0X19sYXlvdXR7ZGlzcGxheTpncmlkO2dyaWQtcm93LWdhcDoyNXB4O2dyaWQtY29sdW1uLWdhcDoyNXB4fS50Yi1ncmlkLWl0ZW17YmFja2dyb3VuZDojZDM4YTAzO3BhZGRpbmc6MzBweH0udGItZ3JpZC1jb2x1bW57ZmxleC13cmFwOndyYXB9LnRiLWdyaWQtY29sdW1uPip7d2lkdGg6MTAwJX0udGItZ3JpZC1jb2x1bW4udGItZ3JpZC1hbGlnbi10b3B7d2lkdGg6MTAwJTtkaXNwbGF5OmZsZXg7YWxpZ24tY29udGVudDpmbGV4LXN0YXJ0fS50Yi1ncmlkLWNvbHVtbi50Yi1ncmlkLWFsaWduLWNlbnRlcnt3aWR0aDoxMDAlO2Rpc3BsYXk6ZmxleDthbGlnbi1jb250ZW50OmNlbnRlcn0udGItZ3JpZC1jb2x1bW4udGItZ3JpZC1hbGlnbi1ib3R0b217d2lkdGg6MTAwJTtkaXNwbGF5OmZsZXg7YWxpZ24tY29udGVudDpmbGV4LWVuZH0gLndwLWJsb2NrLXRvb2xzZXQtYmxvY2tzLWdyaWQudGItZ3JpZFtkYXRhLXRvb2xzZXQtYmxvY2tzLWdyaWQ9IjM3ZDE5NDE3OTgxYjFiOTc5MjBkZjU2YzA4ODg0MGE2Il0geyBncmlkLXRlbXBsYXRlLWNvbHVtbnM6IG1pbm1heCgwLCAwLjA0ZnIpIG1pbm1heCgwLCAwLjk2ZnIpO2dyaWQtYXV0by1mbG93OiByb3cgfSAud3AtYmxvY2stdG9vbHNldC1ibG9ja3MtZ3JpZC50Yi1ncmlkW2RhdGEtdG9vbHNldC1ibG9ja3MtZ3JpZD0iMzdkMTk0MTc5ODFiMWI5NzkyMGRmNTZjMDg4ODQwYTYiXSA+IC50Yi1ncmlkLWNvbHVtbjpudGgtb2YtdHlwZSgybiArIDEpIHsgZ3JpZC1jb2x1bW46IDEgfSAud3AtYmxvY2stdG9vbHNldC1ibG9ja3MtZ3JpZC50Yi1ncmlkW2RhdGEtdG9vbHNldC1ibG9ja3MtZ3JpZD0iMzdkMTk0MTc5ODFiMWI5NzkyMGRmNTZjMDg4ODQwYTYiXSA+IC50Yi1ncmlkLWNvbHVtbjpudGgtb2YtdHlwZSgybiArIDIpIHsgZ3JpZC1jb2x1bW46IDIgfSAud3AtYmxvY2stdG9vbHNldC1ibG9ja3MtZ3JpZC1jb2x1bW4udGItZ3JpZC1jb2x1bW5bZGF0YS10b29sc2V0LWJsb2Nrcy1ncmlkLWNvbHVtbj0iZjU4NmZmN2JmZTFkNzMxN2M2MzE2MmVjN2I3MDM5ZWQiXSB7IGRpc3BsYXk6IGZsZXg7IH0gIC53cC1ibG9jay10b29sc2V0LWJsb2Nrcy1ncmlkLWNvbHVtbi50Yi1ncmlkLWNvbHVtbltkYXRhLXRvb2xzZXQtYmxvY2tzLWdyaWQtY29sdW1uPSJhNmU3M2M5YmNmYjY1NzQ2NjdiZDMwNDNjZDFlOGQ5ZCJdIHsgZGlzcGxheTogZmxleDsgfSAudGItY29udGFpbmVyIC50Yi1jb250YWluZXItaW5uZXJ7d2lkdGg6MTAwJTttYXJnaW46MCBhdXRvfS50Yi1pbWFnZXtwb3NpdGlvbjpyZWxhdGl2ZTt0cmFuc2l0aW9uOnRyYW5zZm9ybSAwLjI1cyBlYXNlfS53cC1ibG9jay1pbWFnZSAudGItaW1hZ2UuYWxpZ25jZW50ZXJ7bWFyZ2luLWxlZnQ6YXV0bzttYXJnaW4tcmlnaHQ6YXV0b30udGItaW1hZ2UgaW1ne21heC13aWR0aDoxMDAlO2hlaWdodDphdXRvO3dpZHRoOmF1dG87dHJhbnNpdGlvbjp0cmFuc2Zvcm0gMC4yNXMgZWFzZX0udGItaW1hZ2UgLnRiLWltYWdlLWNhcHRpb24tZml0LXRvLWltYWdle2Rpc3BsYXk6dGFibGV9LnRiLWltYWdlIC50Yi1pbWFnZS1jYXB0aW9uLWZpdC10by1pbWFnZSAudGItaW1hZ2UtY2FwdGlvbntkaXNwbGF5OnRhYmxlLWNhcHRpb247Y2FwdGlvbi1zaWRlOmJvdHRvbX0gfSBAbWVkaWEgb25seSBzY3JlZW4gYW5kIChtYXgtd2lkdGg6IDU5OXB4KSB7IC50Yi1jb250YWluZXIgLnRiLWNvbnRhaW5lci1pbm5lcnt3aWR0aDoxMDAlO21hcmdpbjowIGF1dG99LnRiLWNvbnRhaW5lciAudGItY29udGFpbmVyLWlubmVye3dpZHRoOjEwMCU7bWFyZ2luOjAgYXV0b30udGItY29udGFpbmVyIC50Yi1jb250YWluZXItaW5uZXJ7d2lkdGg6MTAwJTttYXJnaW46MCBhdXRvfSAud3AtYmxvY2stdG9vbHNldC1ibG9ja3MtY29udGFpbmVyLnRiLWNvbnRhaW5lcltkYXRhLXRvb2xzZXQtYmxvY2tzLWNvbnRhaW5lcj0iMTU0MDZjZWI3NWY1ODhlMGMyN2NhZmFjYzNlZWNkZjgiXSB7IHBhZGRpbmc6IDQwcHggMjVweCA0MHB4IDI1cHg7IH0gLnRiLWJ1dHRvbntjb2xvcjojZjFmMWYxfS50Yi1idXR0b24tLWxlZnR7dGV4dC1hbGlnbjpsZWZ0fS50Yi1idXR0b24tLWNlbnRlcnt0ZXh0LWFsaWduOmNlbnRlcn0udGItYnV0dG9uLS1yaWdodHt0ZXh0LWFsaWduOnJpZ2h0fS50Yi1idXR0b25fX2xpbmt7Y29sb3I6aW5oZXJpdDtjdXJzb3I6cG9pbnRlcjtkaXNwbGF5OmlubGluZS1ibG9jaztsaW5lLWhlaWdodDoxMDAlO3RleHQtZGVjb3JhdGlvbjpub25lICFpbXBvcnRhbnQ7dGV4dC1hbGlnbjpjZW50ZXI7dHJhbnNpdGlvbjphbGwgMC4zcyBlYXNlfS50Yi1idXR0b25fX2xpbms6aG92ZXIsLnRiLWJ1dHRvbl9fbGluazpmb2N1cywudGItYnV0dG9uX19saW5rOnZpc2l0ZWR7Y29sb3I6aW5oZXJpdH0udGItYnV0dG9uX19saW5rOmhvdmVyIC50Yi1idXR0b25fX2NvbnRlbnQsLnRiLWJ1dHRvbl9fbGluazpmb2N1cyAudGItYnV0dG9uX19jb250ZW50LC50Yi1idXR0b25fX2xpbms6dmlzaXRlZCAudGItYnV0dG9uX19jb250ZW50e2ZvbnQtZmFtaWx5OmluaGVyaXQ7Zm9udC1zdHlsZTppbmhlcml0O2ZvbnQtd2VpZ2h0OmluaGVyaXQ7bGV0dGVyLXNwYWNpbmc6aW5oZXJpdDt0ZXh0LWRlY29yYXRpb246aW5oZXJpdDt0ZXh0LXNoYWRvdzppbmhlcml0O3RleHQtdHJhbnNmb3JtOmluaGVyaXR9LnRiLWJ1dHRvbl9fY29udGVudHt2ZXJ0aWNhbC1hbGlnbjptaWRkbGU7dHJhbnNpdGlvbjphbGwgMC4zcyBlYXNlfS50Yi1idXR0b25fX2ljb257dHJhbnNpdGlvbjphbGwgMC4zcyBlYXNlO2Rpc3BsYXk6aW5saW5lLWJsb2NrO3ZlcnRpY2FsLWFsaWduOm1pZGRsZTtmb250LXN0eWxlOm5vcm1hbCAhaW1wb3J0YW50fS50Yi1idXR0b25fX2ljb246OmJlZm9yZXtjb250ZW50OmF0dHIoZGF0YS1mb250LWNvZGUpO2ZvbnQtd2VpZ2h0Om5vcm1hbCAhaW1wb3J0YW50fS50Yi1idXR0b25fX2xpbmt7YmFja2dyb3VuZC1jb2xvcjojNDQ0O2JvcmRlci1yYWRpdXM6MC4zZW07Zm9udC1zaXplOjEuM2VtO21hcmdpbi1ib3R0b206MC43NmVtO3BhZGRpbmc6MC41NWVtIDEuNWVtIDAuNTVlbX0udGItaGVhZGluZ1tkYXRhLXRvb2xzZXQtYmxvY2tzLWhlYWRpbmc9ImU3MzBlNzQxZjEwNzAwNjQ4ODk1NjVmMDZlZDQ0Nzg3Il0gIHsgZm9udC1zaXplOiAyMHB4OyB9ICBoMy50Yi1oZWFkaW5nW2RhdGEtdG9vbHNldC1ibG9ja3MtaGVhZGluZz0iNzU5YjYxZDViNjE3ODFhNDVjY2ViNTkzN2ZmODJkNDMiXSAgeyBmb250LXNpemU6IDIwcHg7IH0gIC50Yi1jb250YWluZXIgLnRiLWNvbnRhaW5lci1pbm5lcnt3aWR0aDoxMDAlO21hcmdpbjowIGF1dG99LnRiLWNvbnRhaW5lciAudGItY29udGFpbmVyLWlubmVye3dpZHRoOjEwMCU7bWFyZ2luOjAgYXV0b30gLndwLWJsb2NrLXRvb2xzZXQtYmxvY2tzLWNvbnRhaW5lci50Yi1jb250YWluZXJbZGF0YS10b29sc2V0LWJsb2Nrcy1jb250YWluZXI9ImIxZDcxMTA3NDIzZWRjYWVjYjQwYTFiMTBiZDc0YzU1Il0geyBib3JkZXItcmFkaXVzOiAwO3BhZGRpbmc6IDBweDtib3JkZXI6IDBweCBzb2xpZCByZ2JhKCAwLCAwLCAwLCAxICk7IH0gLnRiLWNvbnRhaW5lciAudGItY29udGFpbmVyLWlubmVye3dpZHRoOjEwMCU7bWFyZ2luOjAgYXV0b30udGItY29udGFpbmVyIC50Yi1jb250YWluZXItaW5uZXJ7d2lkdGg6MTAwJTttYXJnaW46MCBhdXRvfSAud3AtYmxvY2stdG9vbHNldC1ibG9ja3MtY29udGFpbmVyLnRiLWNvbnRhaW5lcltkYXRhLXRvb2xzZXQtYmxvY2tzLWNvbnRhaW5lcj0iYzhlZjA4MzU1M2MzNzYyMDkwZjYxZDYzMTNiYTc4Y2IiXSB7IHBhZGRpbmctcmlnaHQ6IDBweDtwYWRkaW5nLWxlZnQ6IDBweDsgfSAudGItZ3JpZCwudGItZ3JpZD4uYmxvY2stZWRpdG9yLWlubmVyLWJsb2Nrcz4uYmxvY2stZWRpdG9yLWJsb2NrLWxpc3RfX2xheW91dHtkaXNwbGF5OmdyaWQ7Z3JpZC1yb3ctZ2FwOjI1cHg7Z3JpZC1jb2x1bW4tZ2FwOjI1cHh9LnRiLWdyaWQtaXRlbXtiYWNrZ3JvdW5kOiNkMzhhMDM7cGFkZGluZzozMHB4fS50Yi1ncmlkLWNvbHVtbntmbGV4LXdyYXA6d3JhcH0udGItZ3JpZC1jb2x1bW4+Knt3aWR0aDoxMDAlfS50Yi1ncmlkLWNvbHVtbi50Yi1ncmlkLWFsaWduLXRvcHt3aWR0aDoxMDAlO2Rpc3BsYXk6ZmxleDthbGlnbi1jb250ZW50OmZsZXgtc3RhcnR9LnRiLWdyaWQtY29sdW1uLnRiLWdyaWQtYWxpZ24tY2VudGVye3dpZHRoOjEwMCU7ZGlzcGxheTpmbGV4O2FsaWduLWNvbnRlbnQ6Y2VudGVyfS50Yi1ncmlkLWNvbHVtbi50Yi1ncmlkLWFsaWduLWJvdHRvbXt3aWR0aDoxMDAlO2Rpc3BsYXk6ZmxleDthbGlnbi1jb250ZW50OmZsZXgtZW5kfSAud3AtYmxvY2stdG9vbHNldC1ibG9ja3MtZ3JpZC50Yi1ncmlkW2RhdGEtdG9vbHNldC1ibG9ja3MtZ3JpZD0iZDBkN2FkMmZjNDQ0ZmMxNTFhMDBjNTBhNDM0YjhhY2UiXSB7IGdyaWQtdGVtcGxhdGUtY29sdW1uczogbWlubWF4KDAsIDAuMDhmcikgbWlubWF4KDAsIDAuOTJmcik7Z3JpZC1hdXRvLWZsb3c6IHJvdyB9IC53cC1ibG9jay10b29sc2V0LWJsb2Nrcy1ncmlkLnRiLWdyaWRbZGF0YS10b29sc2V0LWJsb2Nrcy1ncmlkPSJkMGQ3YWQyZmM0NDRmYzE1MWEwMGM1MGE0MzRiOGFjZSJdID4gLnRiLWdyaWQtY29sdW1uOm50aC1vZi10eXBlKDJuICsgMSkgeyBncmlkLWNvbHVtbjogMSB9IC53cC1ibG9jay10b29sc2V0LWJsb2Nrcy1ncmlkLnRiLWdyaWRbZGF0YS10b29sc2V0LWJsb2Nrcy1ncmlkPSJkMGQ3YWQyZmM0NDRmYzE1MWEwMGM1MGE0MzRiOGFjZSJdID4gLnRiLWdyaWQtY29sdW1uOm50aC1vZi10eXBlKDJuICsgMikgeyBncmlkLWNvbHVtbjogMiB9IC50Yi1jb250YWluZXIgLnRiLWNvbnRhaW5lci1pbm5lcnt3aWR0aDoxMDAlO21hcmdpbjowIGF1dG99LnRiLWNvbnRhaW5lciAudGItY29udGFpbmVyLWlubmVye3dpZHRoOjEwMCU7bWFyZ2luOjAgYXV0b30gLndwLWJsb2NrLXRvb2xzZXQtYmxvY2tzLWNvbnRhaW5lci50Yi1jb250YWluZXJbZGF0YS10b29sc2V0LWJsb2Nrcy1jb250YWluZXI9IjBlMThmYjUzMWM1ODAzYzVjOWE2OTg5MDVjYjIzMDhhIl0geyBwYWRkaW5nLXJpZ2h0OiAwcHg7cGFkZGluZy1sZWZ0OiAwcHg7IH0gLnRiLWdyaWQsLnRiLWdyaWQ+LmJsb2NrLWVkaXRvci1pbm5lci1ibG9ja3M+LmJsb2NrLWVkaXRvci1ibG9jay1saXN0X19sYXlvdXR7ZGlzcGxheTpncmlkO2dyaWQtcm93LWdhcDoyNXB4O2dyaWQtY29sdW1uLWdhcDoyNXB4fS50Yi1ncmlkLWl0ZW17YmFja2dyb3VuZDojZDM4YTAzO3BhZGRpbmc6MzBweH0udGItZ3JpZC1jb2x1bW57ZmxleC13cmFwOndyYXB9LnRiLWdyaWQtY29sdW1uPip7d2lkdGg6MTAwJX0udGItZ3JpZC1jb2x1bW4udGItZ3JpZC1hbGlnbi10b3B7d2lkdGg6MTAwJTtkaXNwbGF5OmZsZXg7YWxpZ24tY29udGVudDpmbGV4LXN0YXJ0fS50Yi1ncmlkLWNvbHVtbi50Yi1ncmlkLWFsaWduLWNlbnRlcnt3aWR0aDoxMDAlO2Rpc3BsYXk6ZmxleDthbGlnbi1jb250ZW50OmNlbnRlcn0udGItZ3JpZC1jb2x1bW4udGItZ3JpZC1hbGlnbi1ib3R0b217d2lkdGg6MTAwJTtkaXNwbGF5OmZsZXg7YWxpZ24tY29udGVudDpmbGV4LWVuZH0gLndwLWJsb2NrLXRvb2xzZXQtYmxvY2tzLWdyaWQudGItZ3JpZFtkYXRhLXRvb2xzZXQtYmxvY2tzLWdyaWQ9ImRmN2M4NDNmNTU1Mjc2ZGFjNTA4NTk1M2YzNjEyOGM4Il0geyBncmlkLXRlbXBsYXRlLWNvbHVtbnM6IG1pbm1heCgwLCAwLjA4ZnIpIG1pbm1heCgwLCAwLjkyZnIpO2dyaWQtYXV0by1mbG93OiByb3cgfSAud3AtYmxvY2stdG9vbHNldC1ibG9ja3MtZ3JpZC50Yi1ncmlkW2RhdGEtdG9vbHNldC1ibG9ja3MtZ3JpZD0iZGY3Yzg0M2Y1NTUyNzZkYWM1MDg1OTUzZjM2MTI4YzgiXSA+IC50Yi1ncmlkLWNvbHVtbjpudGgtb2YtdHlwZSgybiArIDEpIHsgZ3JpZC1jb2x1bW46IDEgfSAud3AtYmxvY2stdG9vbHNldC1ibG9ja3MtZ3JpZC50Yi1ncmlkW2RhdGEtdG9vbHNldC1ibG9ja3MtZ3JpZD0iZGY3Yzg0M2Y1NTUyNzZkYWM1MDg1OTUzZjM2MTI4YzgiXSA+IC50Yi1ncmlkLWNvbHVtbjpudGgtb2YtdHlwZSgybiArIDIpIHsgZ3JpZC1jb2x1bW46IDIgfSAgIC53cC1ibG9jay10b29sc2V0LWJsb2Nrcy1ncmlkLWNvbHVtbi50Yi1ncmlkLWNvbHVtbltkYXRhLXRvb2xzZXQtYmxvY2tzLWdyaWQtY29sdW1uPSJlOGU5MmU1MWYyMWU4OTQ0MzdkMzAzYTczY2QyOTQ5YyJdIHsgZGlzcGxheTogZmxleDsgfSAudGItY29udGFpbmVyIC50Yi1jb250YWluZXItaW5uZXJ7d2lkdGg6MTAwJTttYXJnaW46MCBhdXRvfS50Yi1jb250YWluZXIgLnRiLWNvbnRhaW5lci1pbm5lcnt3aWR0aDoxMDAlO21hcmdpbjowIGF1dG99LnRiLWdyaWQsLnRiLWdyaWQ+LmJsb2NrLWVkaXRvci1pbm5lci1ibG9ja3M+LmJsb2NrLWVkaXRvci1ibG9jay1saXN0X19sYXlvdXR7ZGlzcGxheTpncmlkO2dyaWQtcm93LWdhcDoyNXB4O2dyaWQtY29sdW1uLWdhcDoyNXB4fS50Yi1ncmlkLWl0ZW17YmFja2dyb3VuZDojZDM4YTAzO3BhZGRpbmc6MzBweH0udGItZ3JpZC1jb2x1bW57ZmxleC13cmFwOndyYXB9LnRiLWdyaWQtY29sdW1uPip7d2lkdGg6MTAwJX0udGItZ3JpZC1jb2x1bW4udGItZ3JpZC1hbGlnbi10b3B7d2lkdGg6MTAwJTtkaXNwbGF5OmZsZXg7YWxpZ24tY29udGVudDpmbGV4LXN0YXJ0fS50Yi1ncmlkLWNvbHVtbi50Yi1ncmlkLWFsaWduLWNlbnRlcnt3aWR0aDoxMDAlO2Rpc3BsYXk6ZmxleDthbGlnbi1jb250ZW50OmNlbnRlcn0udGItZ3JpZC1jb2x1bW4udGItZ3JpZC1hbGlnbi1ib3R0b217d2lkdGg6MTAwJTtkaXNwbGF5OmZsZXg7YWxpZ24tY29udGVudDpmbGV4LWVuZH0gLndwLWJsb2NrLXRvb2xzZXQtYmxvY2tzLWdyaWQudGItZ3JpZFtkYXRhLXRvb2xzZXQtYmxvY2tzLWdyaWQ9IjM3ZDE5NDE3OTgxYjFiOTc5MjBkZjU2YzA4ODg0MGE2Il0geyBncmlkLXRlbXBsYXRlLWNvbHVtbnM6IG1pbm1heCgwLCAwLjFmcikgbWlubWF4KDAsIDAuOWZyKTtncmlkLWF1dG8tZmxvdzogcm93IH0gLndwLWJsb2NrLXRvb2xzZXQtYmxvY2tzLWdyaWQudGItZ3JpZFtkYXRhLXRvb2xzZXQtYmxvY2tzLWdyaWQ9IjM3ZDE5NDE3OTgxYjFiOTc5MjBkZjU2YzA4ODg0MGE2Il0gPiAudGItZ3JpZC1jb2x1bW46bnRoLW9mLXR5cGUoMm4gKyAxKSB7IGdyaWQtY29sdW1uOiAxIH0gLndwLWJsb2NrLXRvb2xzZXQtYmxvY2tzLWdyaWQudGItZ3JpZFtkYXRhLXRvb2xzZXQtYmxvY2tzLWdyaWQ9IjM3ZDE5NDE3OTgxYjFiOTc5MjBkZjU2YzA4ODg0MGE2Il0gPiAudGItZ3JpZC1jb2x1bW46bnRoLW9mLXR5cGUoMm4gKyAyKSB7IGdyaWQtY29sdW1uOiAyIH0gLndwLWJsb2NrLXRvb2xzZXQtYmxvY2tzLWdyaWQtY29sdW1uLnRiLWdyaWQtY29sdW1uW2RhdGEtdG9vbHNldC1ibG9ja3MtZ3JpZC1jb2x1bW49ImY1ODZmZjdiZmUxZDczMTdjNjMxNjJlYzdiNzAzOWVkIl0geyBkaXNwbGF5OiBmbGV4OyB9ICAud3AtYmxvY2stdG9vbHNldC1ibG9ja3MtZ3JpZC1jb2x1bW4udGItZ3JpZC1jb2x1bW5bZGF0YS10b29sc2V0LWJsb2Nrcy1ncmlkLWNvbHVtbj0iYTZlNzNjOWJjZmI2NTc0NjY3YmQzMDQzY2QxZThkOWQiXSB7IGRpc3BsYXk6IGZsZXg7IH0gLnRiLWNvbnRhaW5lciAudGItY29udGFpbmVyLWlubmVye3dpZHRoOjEwMCU7bWFyZ2luOjAgYXV0b30udGItaW1hZ2V7cG9zaXRpb246cmVsYXRpdmU7dHJhbnNpdGlvbjp0cmFuc2Zvcm0gMC4yNXMgZWFzZX0ud3AtYmxvY2staW1hZ2UgLnRiLWltYWdlLmFsaWduY2VudGVye21hcmdpbi1sZWZ0OmF1dG87bWFyZ2luLXJpZ2h0OmF1dG99LnRiLWltYWdlIGltZ3ttYXgtd2lkdGg6MTAwJTtoZWlnaHQ6YXV0bzt3aWR0aDphdXRvO3RyYW5zaXRpb246dHJhbnNmb3JtIDAuMjVzIGVhc2V9LnRiLWltYWdlIC50Yi1pbWFnZS1jYXB0aW9uLWZpdC10by1pbWFnZXtkaXNwbGF5OnRhYmxlfS50Yi1pbWFnZSAudGItaW1hZ2UtY2FwdGlvbi1maXQtdG8taW1hZ2UgLnRiLWltYWdlLWNhcHRpb257ZGlzcGxheTp0YWJsZS1jYXB0aW9uO2NhcHRpb24tc2lkZTpib3R0b219IH0g
Make your Ruby on Rails (RoR) app multilingual using Rails I18n and use PTC to translate your resource files with context-aware AI.
This guide walks you through:
Making your app’s content translatable using the Rails I18n system
Translating both Ruby and JavaScript strings
Using PTC to translate your resource files and keep translations updated
Each step includes a Git commit from our demo app so you can follow the exact code changes. By the end of this guide, the entire interface — including that button and all system messages — will be available in multiple languages.
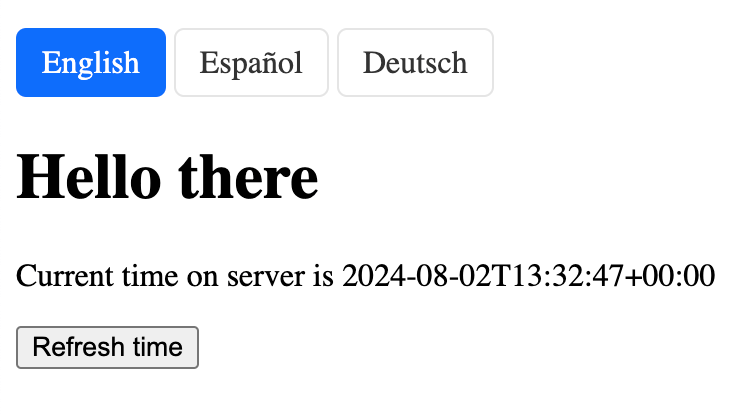
Our multilingual Ruby on Rails demo application with a language switcher
1. Set Up the Rails App
Start by generating a new Rails application:
rails new application_name
This command creates the basic project structure with folders for controllers, views, models, and configuration files.
Next, create the actual application code that adds the UI and logic. For our demo app, we’ll create a controller and view that shows the current server time with a refresh button.
You can refer to the commit below for sample code.
2. Set Up Multilingual Support
To support multiple languages, you need to:
Define the available locales
Set a default language
Add language prefixes to your URLs
Load the correct locale based on the URL
Set Available Locales
In config/application.rb, add:
config.i18n.default_locale = :en I18n .available_locales = [ :en , :es , :de ]
This configures the languages. Here, it sets English as the default language. The app will also support Spanish and German.
Add Locale to Routes
Wrap your routes in a scoped block to prefix them with the language code:
scope " /:locale " do get ' /time ' , to : ' home#index ' , as : :time_display end
This allows URLs like /en/time and /es/time.
Load the Locale from the URL
In app/controllers/application_controller.rb, update the controller:
class ApplicationController < ActionController::Base around_action :switch_locale def switch_locale ( & action ) locale = params[ :locale ] || I18n .default_locale I18n .with_locale(locale, & action) end def default_url_options { locale : I18n .locale } end end
This sets the app’s language based on the current URL and includes the locale in all generated links.
3. Add a Language Switcher
Now that your app supports multiple languages, give users a way to switch between them.
Rails already includes the current locale in all generated URLs, thanks to the default_url_options method in ApplicationController. To let users change languages without losing their place, add a simple UI that updates only the locale parameter in the current URL.
In the demo app, the language switcher is added in app/views/layouts/application.html.erb and styled in app/assets/stylesheets/application.css.
4. Make All Text Translatable (Ruby and JavaScript)
Before translating your app, you need to:
Replace all hard-coded text in your Ruby views and controllers with translation keys.
Add those keys and their default-language values to YAML files in config/locales/.
Add any visible JavaScript strings to the same YAML files so they can be included in translation.
4A. Replace Text in Ruby Views and Controllers
Rails uses the built-in I18n system to fetch and display translated strings based on the active locale. To make your app translatable, go through your views and controllers and replace any visible text with translation keys using the t() helper.
🚫 Incorrect:
< h1 >Hello</ h1 > < p >Current time: <%= @time %> </ p > < button >Refresh</ button >
Hard-coded text like this won’t appear in your YAML file and can’t be translated.
Then, create a YAML (YAML Ain’t Markup Language) file inside the config/locales/ directory. Define those keys and their default-language values like this:
en : hello : " Hello " current_time : " Current time: %{time} " refresh : " Refresh " 4B: Add JavaScript Strings to Your YAML File
If your JavaScript shows any text to users (like alerts, tooltips, or confirmation messages), you need to include those strings in your source-language YAML file as well.
Rails doesn’t automatically extract text from JavaScript files, but PTC can translate these strings, as long as they exist in your .yml file.
For example, to translate a confirmation popup in JavaScript, add the string to config/locales/en.yml:
en : confirm : " Are you sure? " You can now download your source language file (en.yml). It contains all the keys and text strings for translation into other languages.
5. Translate YAML Files with PTC
Once you store your app’s text in .yml files under config/locales/, you’re ready to translate it. Private Translation Cloud (PTC) detects these files automatically, translates the content, and sends the translated files back to your repository.
6. Load Translations in JavaScript
Your translated .yml files work automatically in Rails views. But JavaScript can’t read YAML. It needs a JSON version of your translations.
To make your translations available in JavaScript, convert the YAML files into a single JSON file and expose it to the browser. For our demo project, we’ll use the i18n-js gem to handle the file conversion:
Add the gem "i18n-js" to your Gemfile and run bundle install.
After installation, run i18n init to generate the default configuration.
Update your configuration to set the file to public/locales.json. This step prepares your app to store translations in a JSON file that JavaScript can access.
Finally, run the i18n export command. This command reads the translations from your YAML files and writes them into a JSON file in the public directory.
7. Use Translations in JavaScript
Now that you’ve exported your translations to public/locales.json, you can load them in your JavaScript code and display the correct strings based on the selected language.
You can use Importmap , introduced in Rails 7, to manage JavaScript dependencies without bundlers.
To give your JavaScript code access to the translations:
In config/importmap.rb, pin the i18n-js library and your custom loader script:
pin " i18n-js " , to : " https://esm.sh/i18n-js@latest/dist/import/index.js " pin " load_locale " , to : " load_locale.js "
Here, i18n-js handles language switching and lookups, while load_locale.js fetches the JSON file.
Create a file in app/javascript/load_locale.js with the following content to load the translations:
export async function loadLocale () { const response = await fetch ( ' /locales.json ' ); const data = await response. json (); return data; }
This function fetches the language data generated in the previous steps.
8. Display the Right Language in JavaScript
To make sure your JavaScript uses the correct language, your code needs to know which locale is currently active. You’ve already set up i18n-js and loaded the translations. Now you just need to:
Use i18n.t() to display translated text
Pass the active locale to the frontend
Initialize i18n-js with that locale
To do this:
First, tell JavaScript the current language by adding the language code to your page’s <body> tag in config/layouts/application.html.erb:
< body data-locale = " <%= I18n .locale %> " >
Next, load the i18n-js library and your translations. The i18n-js library helps manage translations in JavaScript. Import this library and load your translations in your JavaScript code:
import { I18n } from " i18n-js " import { loadLocale } from ' ./load_locale '
When the page loads, fetch the translations and initialize i18n-js. Then assign the configured i18n instance to a global variable so your JavaScript code can access it.
document. addEventListener ( ' turbo:load ' , async () => { const translations = await loadLocale (); const i18n = new I18n (translations); i18n.locale = document.body.dataset[ ' locale ' ]; });
Finally, use the i18n.t method to get the translated strings in your JavaScript code:
if ( confirm (i18n. t ( ' confirm ' ))) {
Now, your JavaScript will display text in the language the user has selected, just like it does in the Rails views.