Set up Rails i18n and localization for your app. Organize translation files, switch between languages, and automate translations with AI.
This guide covers the full Rails internationalization workflow: configuring i18n, organizing YAML translation files, handling dynamic content, and automating translations. It also touches on software localization more broadly, because getting your Rails app translation-ready is just one part of shipping a product that works for users in other languages.
To show you how Rails internationalization works in practice, we built a small Ruby on Rails demo application. The app displays the current server time with a refresh button and includes a simple language switcher.
You can apply these concepts to your existing Rails application, or create a new Rails app with rails new YourAppName and build along with us.
For the full source code, see GitHub: Rails i18n Demo App
Configuring Rails Internationalization (i18n)
Rails internationalization requires three configuration steps: setting available locales, adding locale to your URLs, and making Rails load the correct locale for each request. You’ll also want to install the rails-i18n gem, which provides locale data like translated month names, pluralization rules, and default Rails error messages.
Set Available Locales
First, in config/application.rb, tell Rails which languages the app should support and set a default locale:
config.i18n.default_locale = :en
config.i18n.available_locales = [:en, :es, :de]This tells Rails that English is the default language, and that the app supports English, Spanish, and German. You can add any language codes you need.
Add Locale to URLs
Next, add the locale to the URL so each language has its own path, like /en/time or /es/time:
# config/routes.rb
scope "/:locale" do
  get '/time', to: 'home#index', as: :time_display
endConfigure Locale Switching
Finally, in app/controllers/application_controller.rb, make sure Rails loads the right locale from the URL and includes it in all links:
class ApplicationController < ActionController::Base
  around_action :switch_locale

  def switch_locale(&action)
    locale = params[:locale] || I18n.default_locale
    I18n.with_locale(locale, &action)
  end

  def default_url_options
    { locale: I18n.locale }
  end
endThis reads the locale from the URL parameter, falls back to the default locale if none is present, and ensures all generated URLs include the current locale.
Install the rails-i18n Gem
The rails-i18n gem provides locale data for multiple languages, including translated month names, pluralization rules, and default Rails error messages. This saves you from translating these standard strings yourself.
Add it to your Gemfile:
gem 'rails-i18n'
Then run:
bundle install
Rails is now fully configured for internationalization.
Adding a Language Switcher
Now that your Rails app supports multiple locales, your users need a way to switch between languages. Because the default_url_options method in ApplicationController automatically includes the current locale in all generated URLs, you can create a switcher that only updates the locale parameter while keeping the user on the same page.
Create the Language Switcher UI
Add the language switcher to your layout file. In our demo app, it goes in app/views/layouts/application.html.erb:
<nav>
  <%= link_to "English", url_for(locale: :en) %> |
  <%= link_to "Español", url_for(locale: :es) %> |
  <%= link_to "Deutsch", url_for(locale: :de) %>
</nav>Each link uses url_for(locale: :locale_code) to generate a URL with the specified locale. When a user clicks a link, the switch_locale method in ApplicationController detects the change and Rails renders the page in the new language.
Because default_url_options is defined, the locale persists as users navigate. You don’t need to manually add locale parameters to every link.
Style Your Language Switcher
You can style the language switcher in app/assets/stylesheets/application.css to match your design. The demo app includes basic styling to make the switcher visible and user-friendly.
Setting Up Translation Keys in Rails Views
Before you can translate your app, all user-facing text needs to live in Rails i18n files instead of being hard-coded. Rails provides the t helper method (short for translate) to look up and display translated strings.
Replace Hard-Coded Text with Translation Keys
Hard-coded text won’t appear in your YAML file, which means it can’t be translated later. Always use translation keys for any user-facing text.
Correct (using translation keys):
<h1><%= t(:hello) %></h1>
<p><%= t(:current_time, time: @time) %></p>
<button id="click-me"><%= t(:refresh) %></button>
Incorrect (hard-coded text):
<h1>Hello</h1>
<p>Current time: <%= @time %></p>
<button>Refresh</button>Using Interpolation in Translations
Notice the time: @time parameter in the example above? This is called interpolation — it lets you insert dynamic values into your translations. The translation string in your YAML file uses %{time} as a placeholder:
current_time: "Current time: %{time}"When you call the t helper with time: @time, Rails replaces %{time} with the actual value. You can use any variable names you want — just make sure they match between the YAML file and your view.
Lazy Lookup for Cleaner Code
When your translation keys are organized to match your view folder structure, Rails lets you use a shortcut called lazy lookup. Instead of writing the full key path, use a leading dot:
<!-- Instead of this: -->
<%= t('home.index.hello') %>

<!-- You can write this: -->
<%= t('.hello') %>
Rails looks at which view file you’re in (home/index.html.erb) and automatically adds home.index. in front of your key. This keeps your code cleaner and makes it easier to move views around. If you rename or relocate a view, the lazy lookup paths update automatically.
Creating and Organizing Translation Files
Now that you’ve added translation keys to your views, you need to define those keys in a YAML file. Rails stores these in the config/locales/ directory.
Add Keys to Your Source Language File
Open config/locales/en.yml and add the keys you referenced in your views:
# config/locales/en.yml
en:
  hello: "Hello"
  current_time: "Current time: %{time}"
  refresh: "Refresh"
This is your source file — it contains all the text in your default language. The keys on the left are what your views reference; the strings on the right are what gets displayed.
Organizing Keys with Nesting
To use lazy lookup (the .hello shortcut from the previous section), organize your keys to match your view folder structure:
en:
  home:
    index:
      hello: "Hello"
      current_time: "Current time: %{time}"
      refresh: "Refresh"
This groups all translations for app/views/home/index.html.erb under home.index. Now you can use t('.hello') in that view instead of t('home.index.hello').
As your Rails application grows, you can also create namespaces for shared translations (like shared.navigation for menus) to keep things organized, but this is optional.
Add JavaScript Strings to YAML
Rails doesn’t automatically extract text from JavaScript files. If your app has client-side text like alerts, tooltips, or confirmation messages, add them to your English translation file:
# config/locales/en.yml
en:
confirm: "Are you sure?"At this point, your en.yml file contains all the text that appears in your app – both in Rails views and in JavaScript.
When you use PTC to translate your application (covered in the next section), these JavaScript strings will be translated along with everything else.
Translating Rails Apps with PTC
Now it’s time to get translations for all the text in your YAML file. Instead of manually translating hundreds of strings, you can use Private Translation Cloud (PTC).
PTC uses AI to translate your YAML files while preserving their structure, keys, and placeholders. You can start with the free trial, which lets you translate 20,000 words into any two languages — no credit card required. After that, you only pay for what you translate.
If you want to know what costs look like for your project before you sign up, the pricing calculator gives you an estimate upfront.
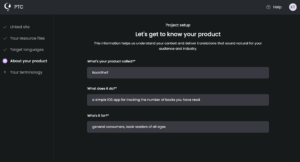
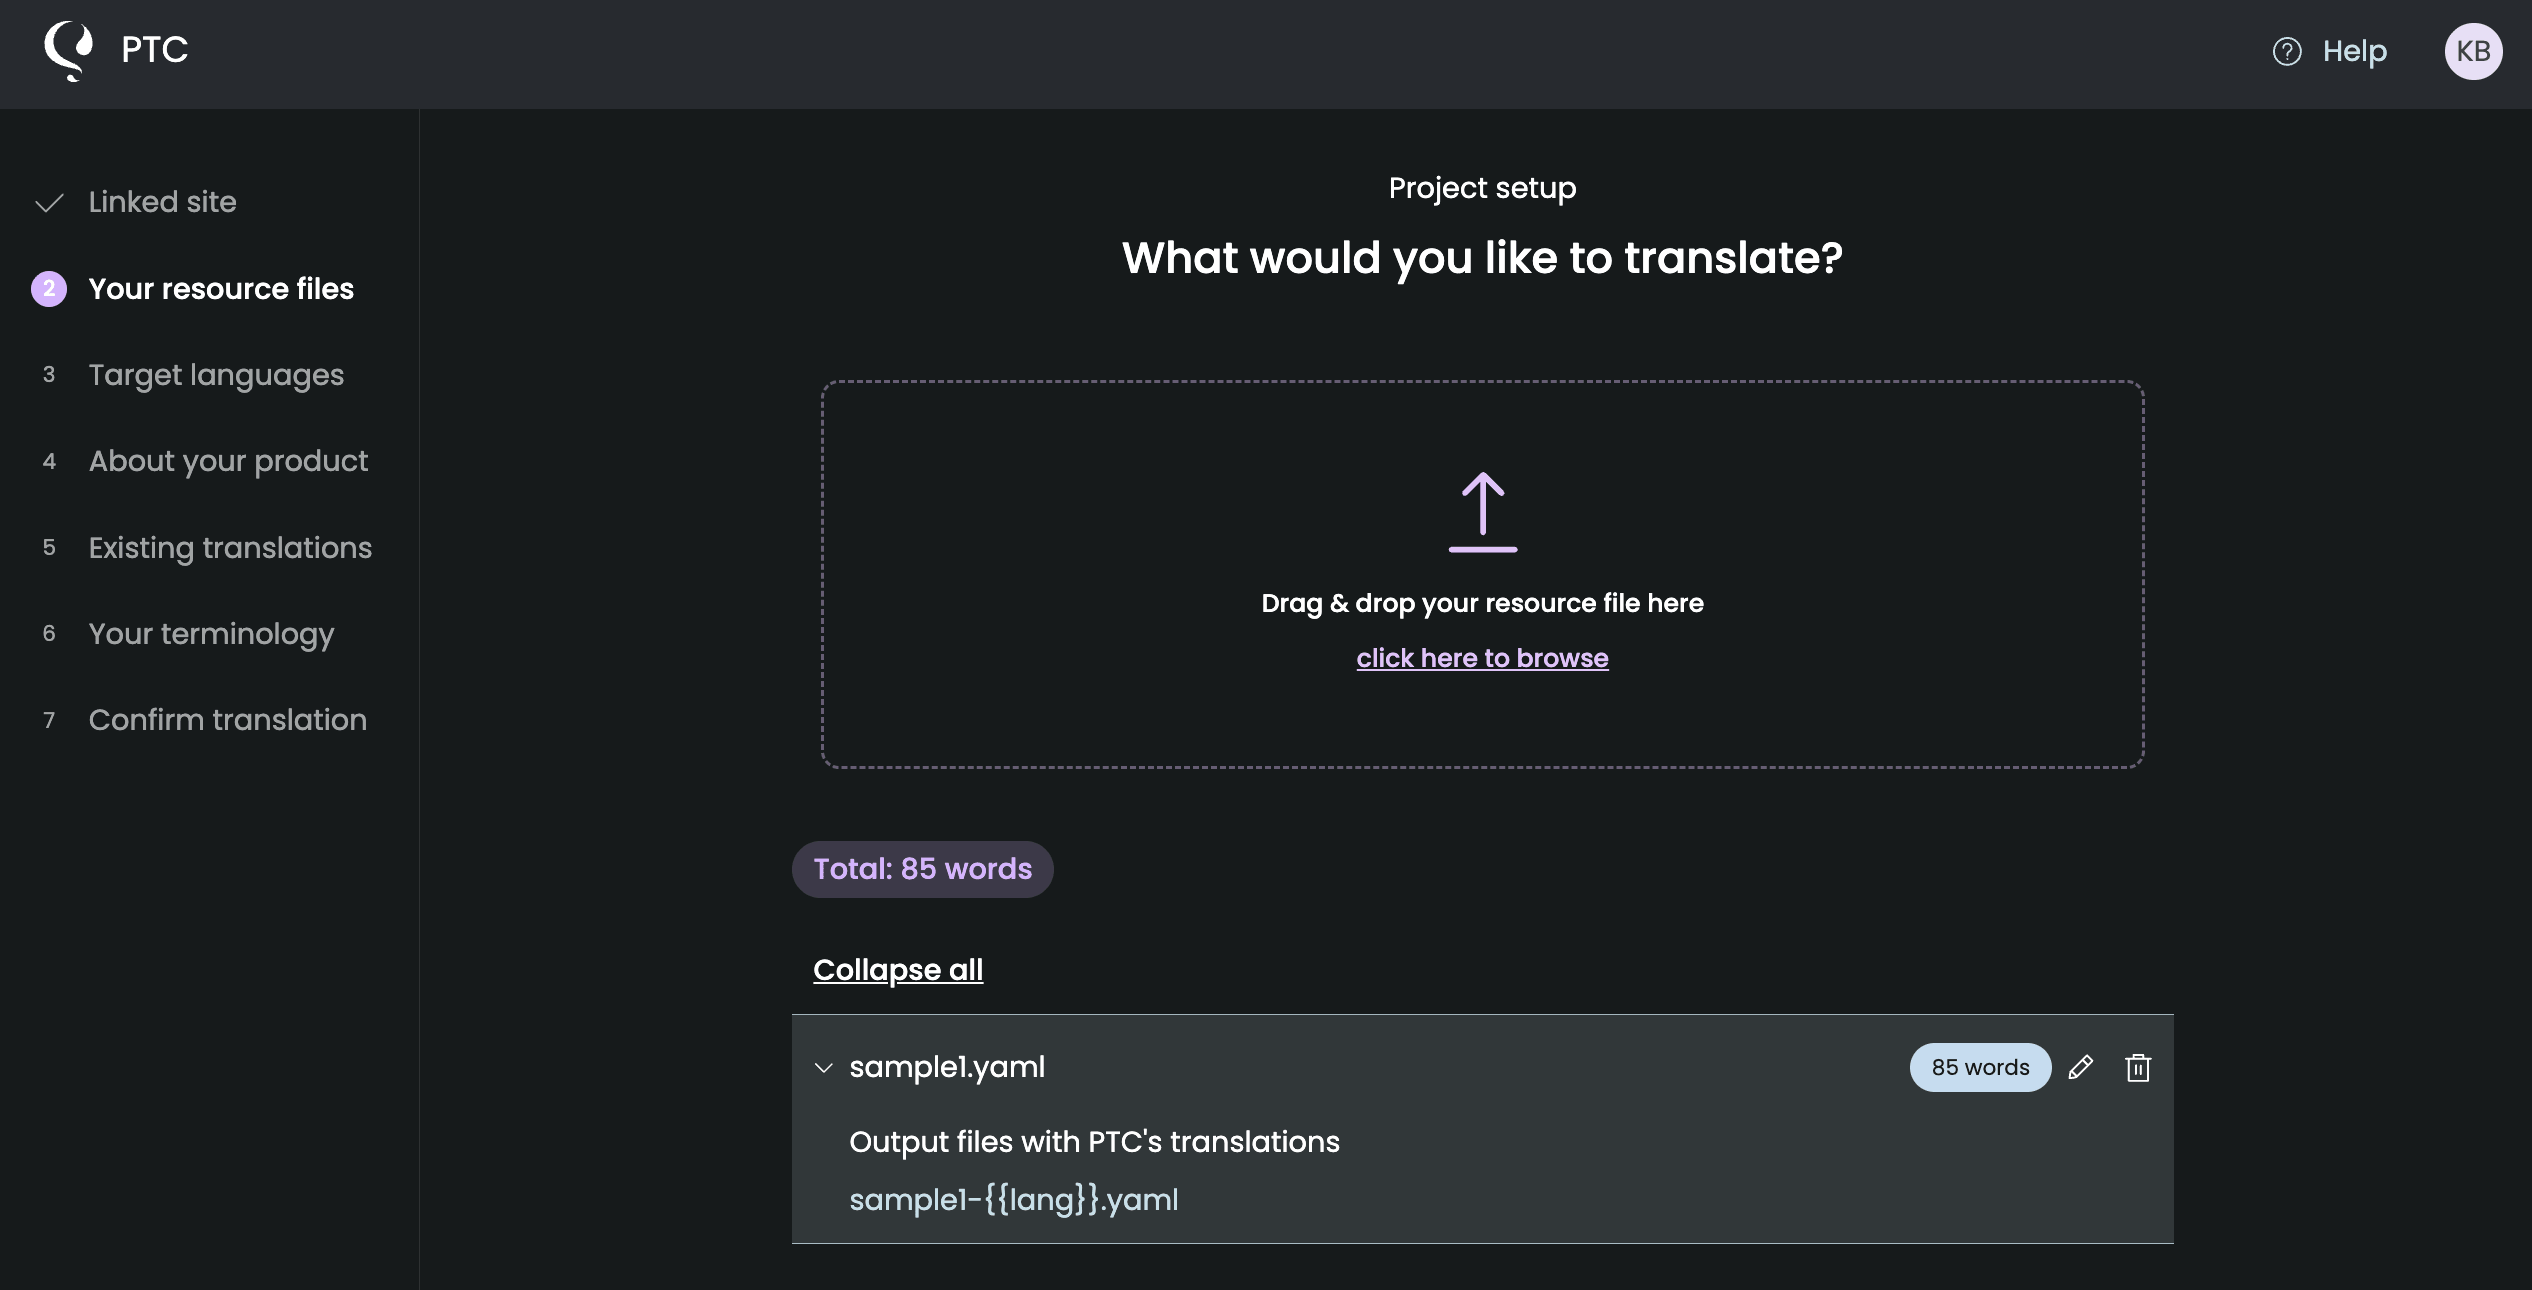
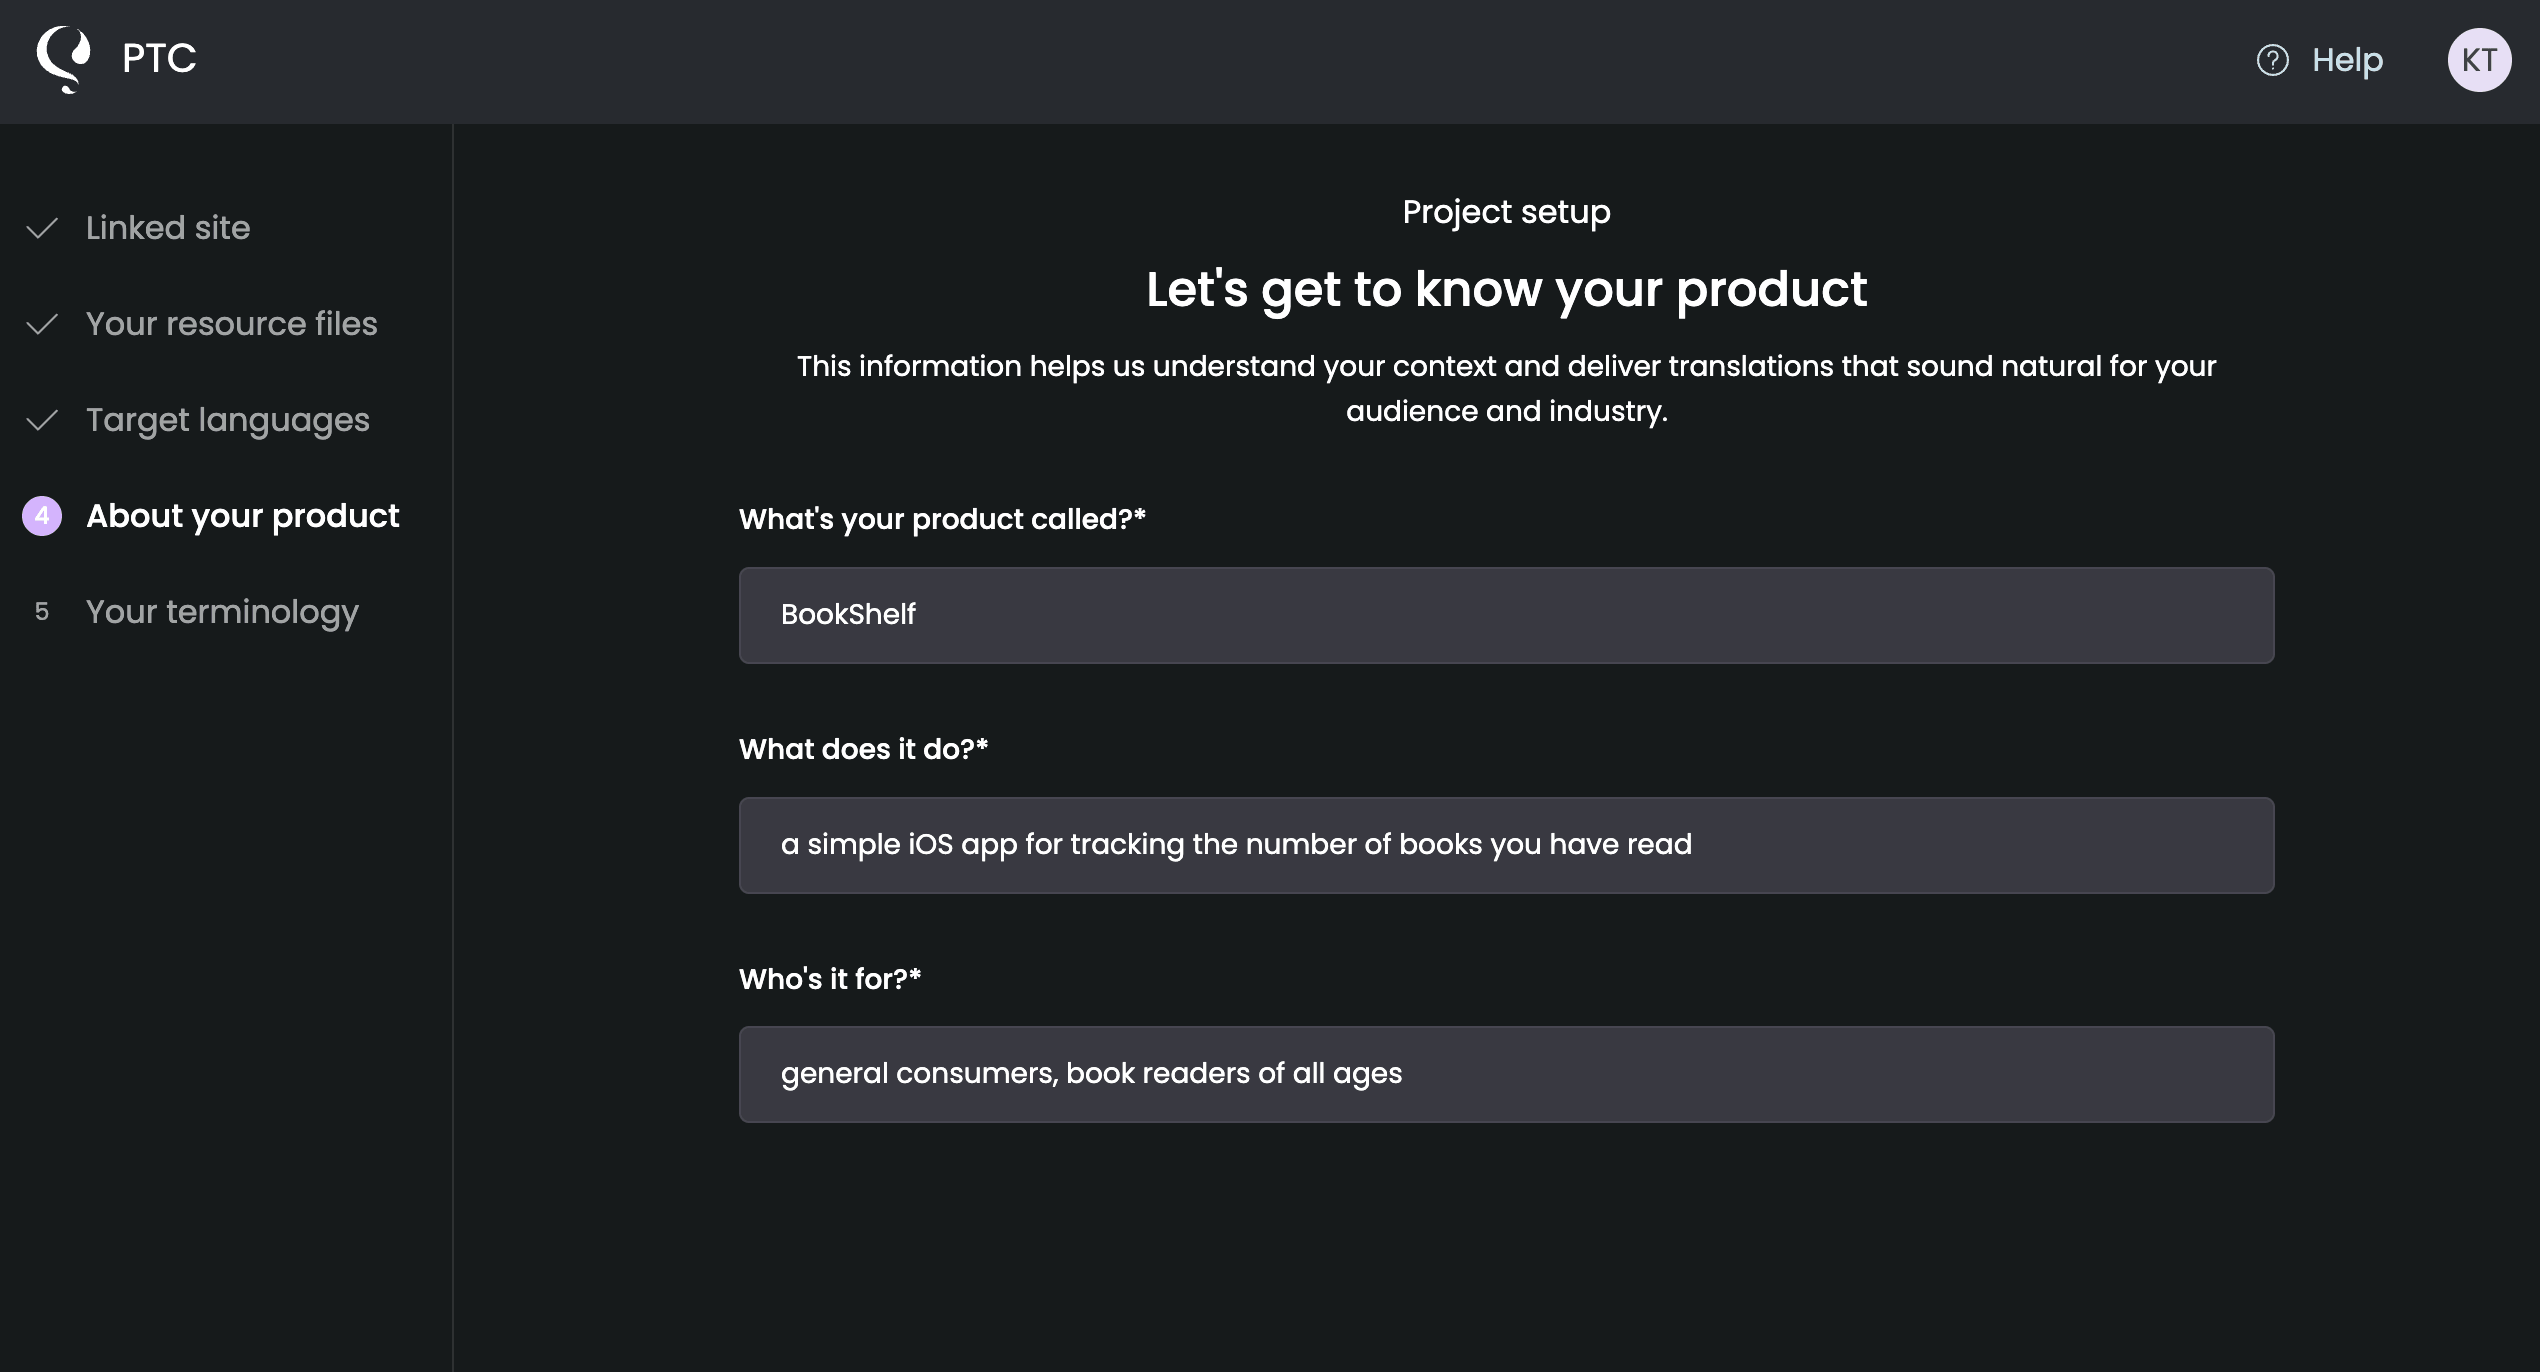
After signing up, a setup wizard walks you through a few quick steps: uploading your YAML file and setting output paths, selecting your target languages, and adding a short description of your application and its audience. For a complete walkthrough, see our Getting Started Guide.

Converting Translations for JavaScript
Now that you have translated YAML files from PTC, you need to make those translations available to JavaScript. JavaScript can’t read YAML files directly – it needs JSON files.
Installing i18n-js
The i18n-js gem converts your YAML translation files into JSON format that browsers can read.
Add the gem to your Gemfile:
gem 'i18n-js'
Then run:
bundle install
After installation, initialize the gem:
i18n init
This generates a configuration file. Update it to export translations to public/locales.json:
# config/i18n.rb
require "i18n-js"

I18n::JS.config do |config|
  config.export_i18n_js = false
  config.translations_path = "public/locales.json"
end
Exporting Translations to JSON
Run the export command to generate the JSON file:
i18n export
This reads all your YAML files (en.yml, es.yml, de.yml) and creates public/locales.json with all translations in a format JavaScript can use.
Loading Translations in JavaScript
Rails 7+ includes Importmap for managing JavaScript dependencies without bundlers.
Pin the i18n-js library in config/importmap.rb:
# config/importmap.rb
pin "i18n-js", to: "https://esm.sh/i18n-js@latest/dist/import/index.js"
pin "load_locale", to: "load_locale.js"
Create a loader function in app/javascript/load_locale.js:
// app/javascript/load_locale.js
export async function loadLocale() {
  const response = await fetch('/locales.json');
  const data = await response.json();
  return data;
}
This function fetches the JSON file containing all your translations.
Using Translations in JavaScript
Pass the current locale to JavaScript by adding it to the <body> tag in your layout:
<!-- app/views/layouts/application.html.erb -->
<body data-locale="<%= I18n.locale %>">Then import i18n-js and use translations in your JavaScript:
// app/javascript/application.js
import { I18n } from "i18n-js"
import { loadLocale } from "./load_locale"

document.addEventListener('turbo:load', async () => {
  // Load all translations
  const translations = await loadLocale()
  const i18n = new I18n(translations)

  // Set the locale from the body tag
  i18n.locale = document.body.dataset['locale']

  // Use translations in your JavaScript
  if (confirm(i18n.t('confirm'))) {
    // User clicked OK
  }
})
The i18n.t() method works like Rails’ t helper. When users switch languages, JavaScript automatically uses the correct translations from the data-locale attribute.
Other Rails i18n Features
This guide covered the core Rails internationalization workflow: setting up i18n, organizing translations, and automating the translation process. Rails i18n includes additional features you might need as your application grows.
How do I localize dates and times?
Rails provides the l helper (short for localize) to format dates and times according to each locale’s conventions:
<%= l Time.now, format: :long %>The rails-i18n gem you installed provides default date and time formats for many languages, including translated month names and locale-specific formatting. You can also define custom formats in your YAML files.
How do I localize numbers and currency?
Rails includes helpers for formatting numbers and currency according to locale:
<%= number_to_currency(100, locale: :es) %>  <!-- €100.00 -->
<%= number_with_delimiter(1000000) %>        <!-- 1,000,000 -->
These helpers respect locale-specific conventions for decimal separators, thousand delimiters, and currency symbols.
Can I create different view files for each language?
Yes. For pages with significantly different content per locale, you can create separate view files:
app/views/pages/
  about.html.erb     <!-- Default -->
  about.es.html.erb  <!-- Spanish version -->
  about.de.html.erb  <!-- German version -->
Rails automatically renders the appropriate view based on the current locale.
Ready to translate your Rails app?
Start your free 30-day trial with PTC and get 20,000 words translated into two languages—no credit card required.