Long translations can break your software layout. Learn how to keep your interface clean and functional in every language.
When localizing software, translation length isn’t always predictable. Some languages take up more space than others, and these differences can cause elements of your user interface (UI) to break.
Take the example below. The Polish translation of “Low battery” is 65% wider than the English version. Without enough space, the translation might overflow, get cut off, or push other elements out of place.
![]() English
English

122 px
![]() Polish
Polish

207 px
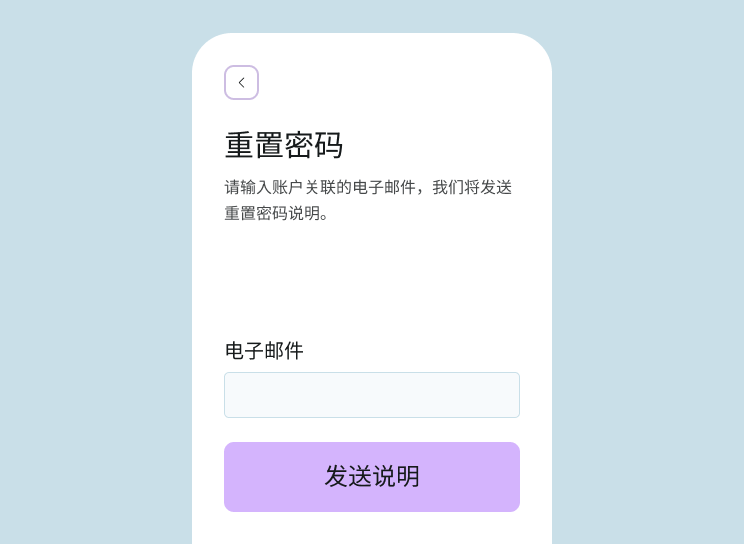
Now, consider the opposite case. Some languages, like Chinese, use fewer characters to express the same meaning.
![]() English
English
150 px
![]() Chinese
Chinese

63 px
If your user interface only considers English text, shorter translations may leave too much empty space, making labels and buttons feel disconnected.
To prevent layout issues before launch, this guide teaches you how to:
- Simulate long translations
- Adapt layouts for different text lengths
- Use PTC’s length-check warnings to catch issues early
Best Practices to Prevent Translations From Breaking Your UI
A well-built UI adapts to both short and long translations. No single approach works for every interface, but these best practices help keep your layout responsive and readable in different languages.
1. Simulate Long Translations Before Deployment
Before adding real translations, it’s important to check how your current UI handles longer text. One way to test this is by generating artificially expanded translations. Instead of manually modifying each string, you can use a script to increase text length across an entire resource file.
For example, if you’re developing a WordPress theme or plugin, you can use our dummy translation tool:

It takes an existing .po file, expands the translated strings by a set factor, and generates a new .po and .mo file for testing. By default, it increases the length by 1.5x, but you can customize this to match your needs.
2. Manually Check Your Software’s GUI for Layout Sensitivities
After generating dummy long translations, load them into your software and check how your UI handles the expanded text. While automated tests can catch some translation length issues, they don’t always reveal usability problems.
Navigate through different screens and look for:
Cut-off text
Some text might disappear or fail to display fully

Overlapping elements
Buttons, labels, or UI components may collide
Misaligned layouts
Longer translations can push elements out of place
Unreadable text
Some UI components might shrink or compress text
Uneven spacing
Short translations may create excessive gaps
For best results, resize windows (for desktop applications), test on different screen sizes (for web/mobile), and take screenshots of broken layouts. This will help you pinpoint areas that may need flexible layout adjustments before adding real translations.
3. Adapt the Layout to Be Flexible
If your manual review reveals recurring layout issues, don’t fix elements one by one. Make your UI more adaptable instead.
Rather than forcing text to fit within fixed spaces, build layouts that automatically expand and shrink based on content.
Use auto-scaling elements
Focus only on strings that may cause real UI problems. Buttons, labels, and input fields should adjust to text length instead of having fixed widths.
Take a look at the examples below. The first approach sets fixed dimensions, restricting text from expanding and making it hard for icons and text to align dynamically. The second approach uses relative units and flexbox, allowing the button to grow dynamically while keeping text and icons properly aligned.
Fixed Layout (Problematic)
button {
  display: inline-block; /* Static display */
  width: 150px; /* Fixed width */
  height: 40px; /* Fixed height */
  padding: 10px; /* Fixed padding */
  font-size: 14px; /* Fixed font size */
  …
}Flexible Layout (Better Approach)
button {
  display: inline-flex; /* Use flexbox for alignment */
  align-items: center; /* Center content vertically */
  justify-content: center; /* Center content horizontally */
  padding: 0.75em 1.5em; /* Relative padding for scalability */
  font-size: 1rem; /* Relative font size */
  …
}Enable text wrapping
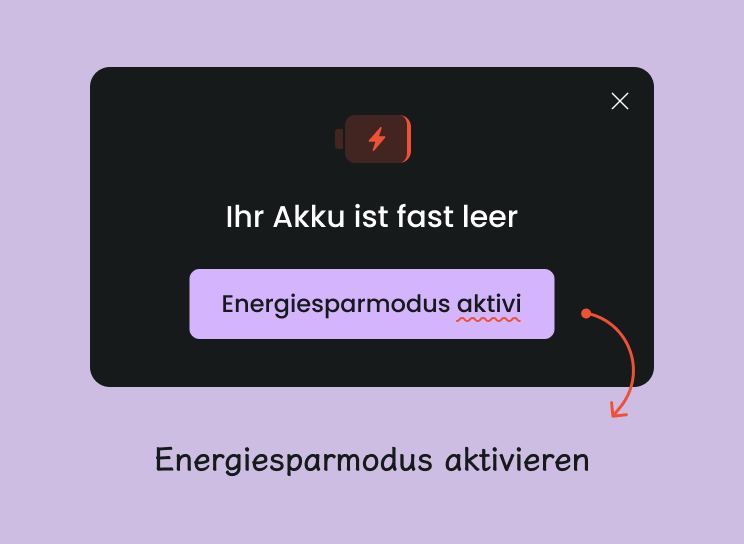
Longer translations may not fit on a single line. Allowing text to wrap prevents truncation.
A settings panel labeled “Battery Percentage” in English may become “Prozentanzeige für Batterie” in German, which won’t fit in a single line.
Without Wrapping (Problematic)
.nav-item {
  white-space: nowrap;
}With Wrapping (Better Approach)
.nav-item {
  white-space: normal;
  word-wrap: break-word;
}Avoid fixed-width containers
Instead of setting rigid dimensions, allow containers to adjust based on content. This allows elements like sidebar menus to work across languages.
Fixed Width (Problematic)
.sidebar {
  width: 250px;
}Flexible Width (Better Approach)
.sidebar {
  min-width: 250px;
  max-width: 40%;
}Use relative spacing
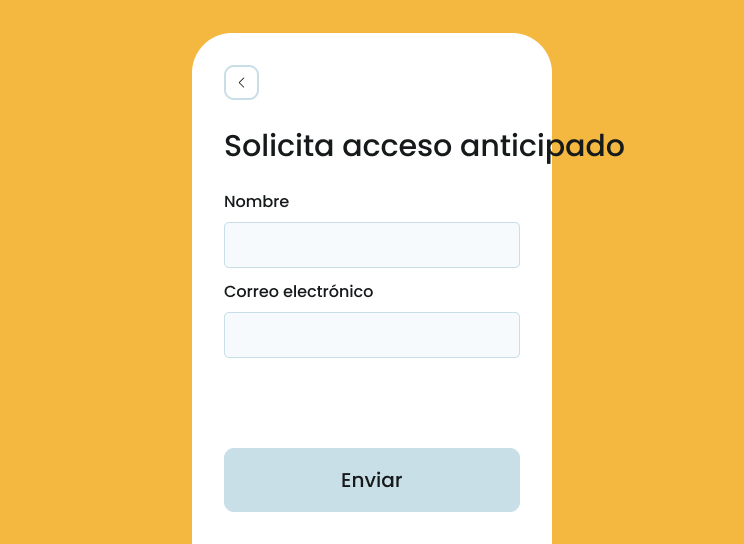
Fixed padding and margins can cause misalignment when text expands. Using percentages ensures spacing remains proportional. A login form with “Username” and “Password” fields may look fine in English but become unbalanced in French (“Nom d’utilisateur”).
Fixed Spacing (Problematic)
label {
  margin-right: 20px;
}Relative Spacing (Better Approach)
label {
  margin-right: 5%;
}4. Keep a Short List of UI Elements That Need Manual Adjustments
Even with flexible layouts, some UI elements may still require manual attention. This includes:
- Navigation menus
- Small buttons, labels, or tooltips
- Fixed-width elements
- String concatenations
If certain components consistently break when translated, flag them to keep track of layout-sensitive elements that require extra review.
You can then use PTC to check for translation length issues before deployment, ensuring your interface works correctly across languages.
How to Use PTC to Make Sure Translations Fit Your Layout
When you’re ready, you can sign up for a free 30 day trial and use PTC to translate your project.
PTC uses AI to generate Better Than Human Translations. By default, it applies project-wide length limits based on each target language. For example:
- Polish → Default length limit: 120%
- German → Default length limit: 130%
If any translation exceeds this limit, PTC flags it for review. When this happens, you can:

Follow the prompt and expand additional options for the flagged string(s).
Then, decide how to proceed.

Allow a longer translation if your UI has enough space.
You can adjust the length limit for this specific string to accommodate a longer translation.

Ask PTC to retranslate the string to make it shorter.
Keep in mind that PTC always prioritizes the best possible translation first, so a shorter retranslation may not be as accurate.
With this approach, you:
- Focus only on strings that may cause real UI problems
- Avoid applying unnecessary length restrictions across your entire project
- Make decisions based on real UI behavior
Keep Your UI Ready for Any Language
A well-planned UI adapts to different languages without breaking. Simulating long translations, testing your layout, and making your UI flexible can help prevent issues before they happen.
PTC takes this further by detecting translations that exceed length limits and giving you options on how to proceed. You can adjust length constraints, request a retranslation, or adapt your UI to fit the translation—all before deployment.

Don’t Let Long Translations Break Your Interface
Start your free trial of PTC and translate up to 20,000 words into 2 languages. Ensure every translation fits into your software.