GitHub Localization
Automate GitHub localization by integrating with PTC. Get automatic pull requests containing human-quality translations.
How To Integrate GitHub with PTC
PTC connects to your GitHub repository and keeps your resource files translated as you work. Push changes to your code and PTC will automatically detect them, translate the updated strings, and open a pull request — all without any manual steps on your end.
Git integration is a Pro feature. It becomes available when you activate Pay-As-You-Go.
Connect Your Repository
Getting started with GitHub integration is easy:
- If you already have a PTC account and are creating a subsequent project, select Git Integration in the setup wizard.
- If you started with a manual file upload, you can switch to a continuous Git-based workflow at any time. Go to Settings → Merge Requests and click Add Git Integration.
In both cases, you’ll see a screen where you can enter the URL to your project within the repository. PTC will automatically detect the service you’re using.
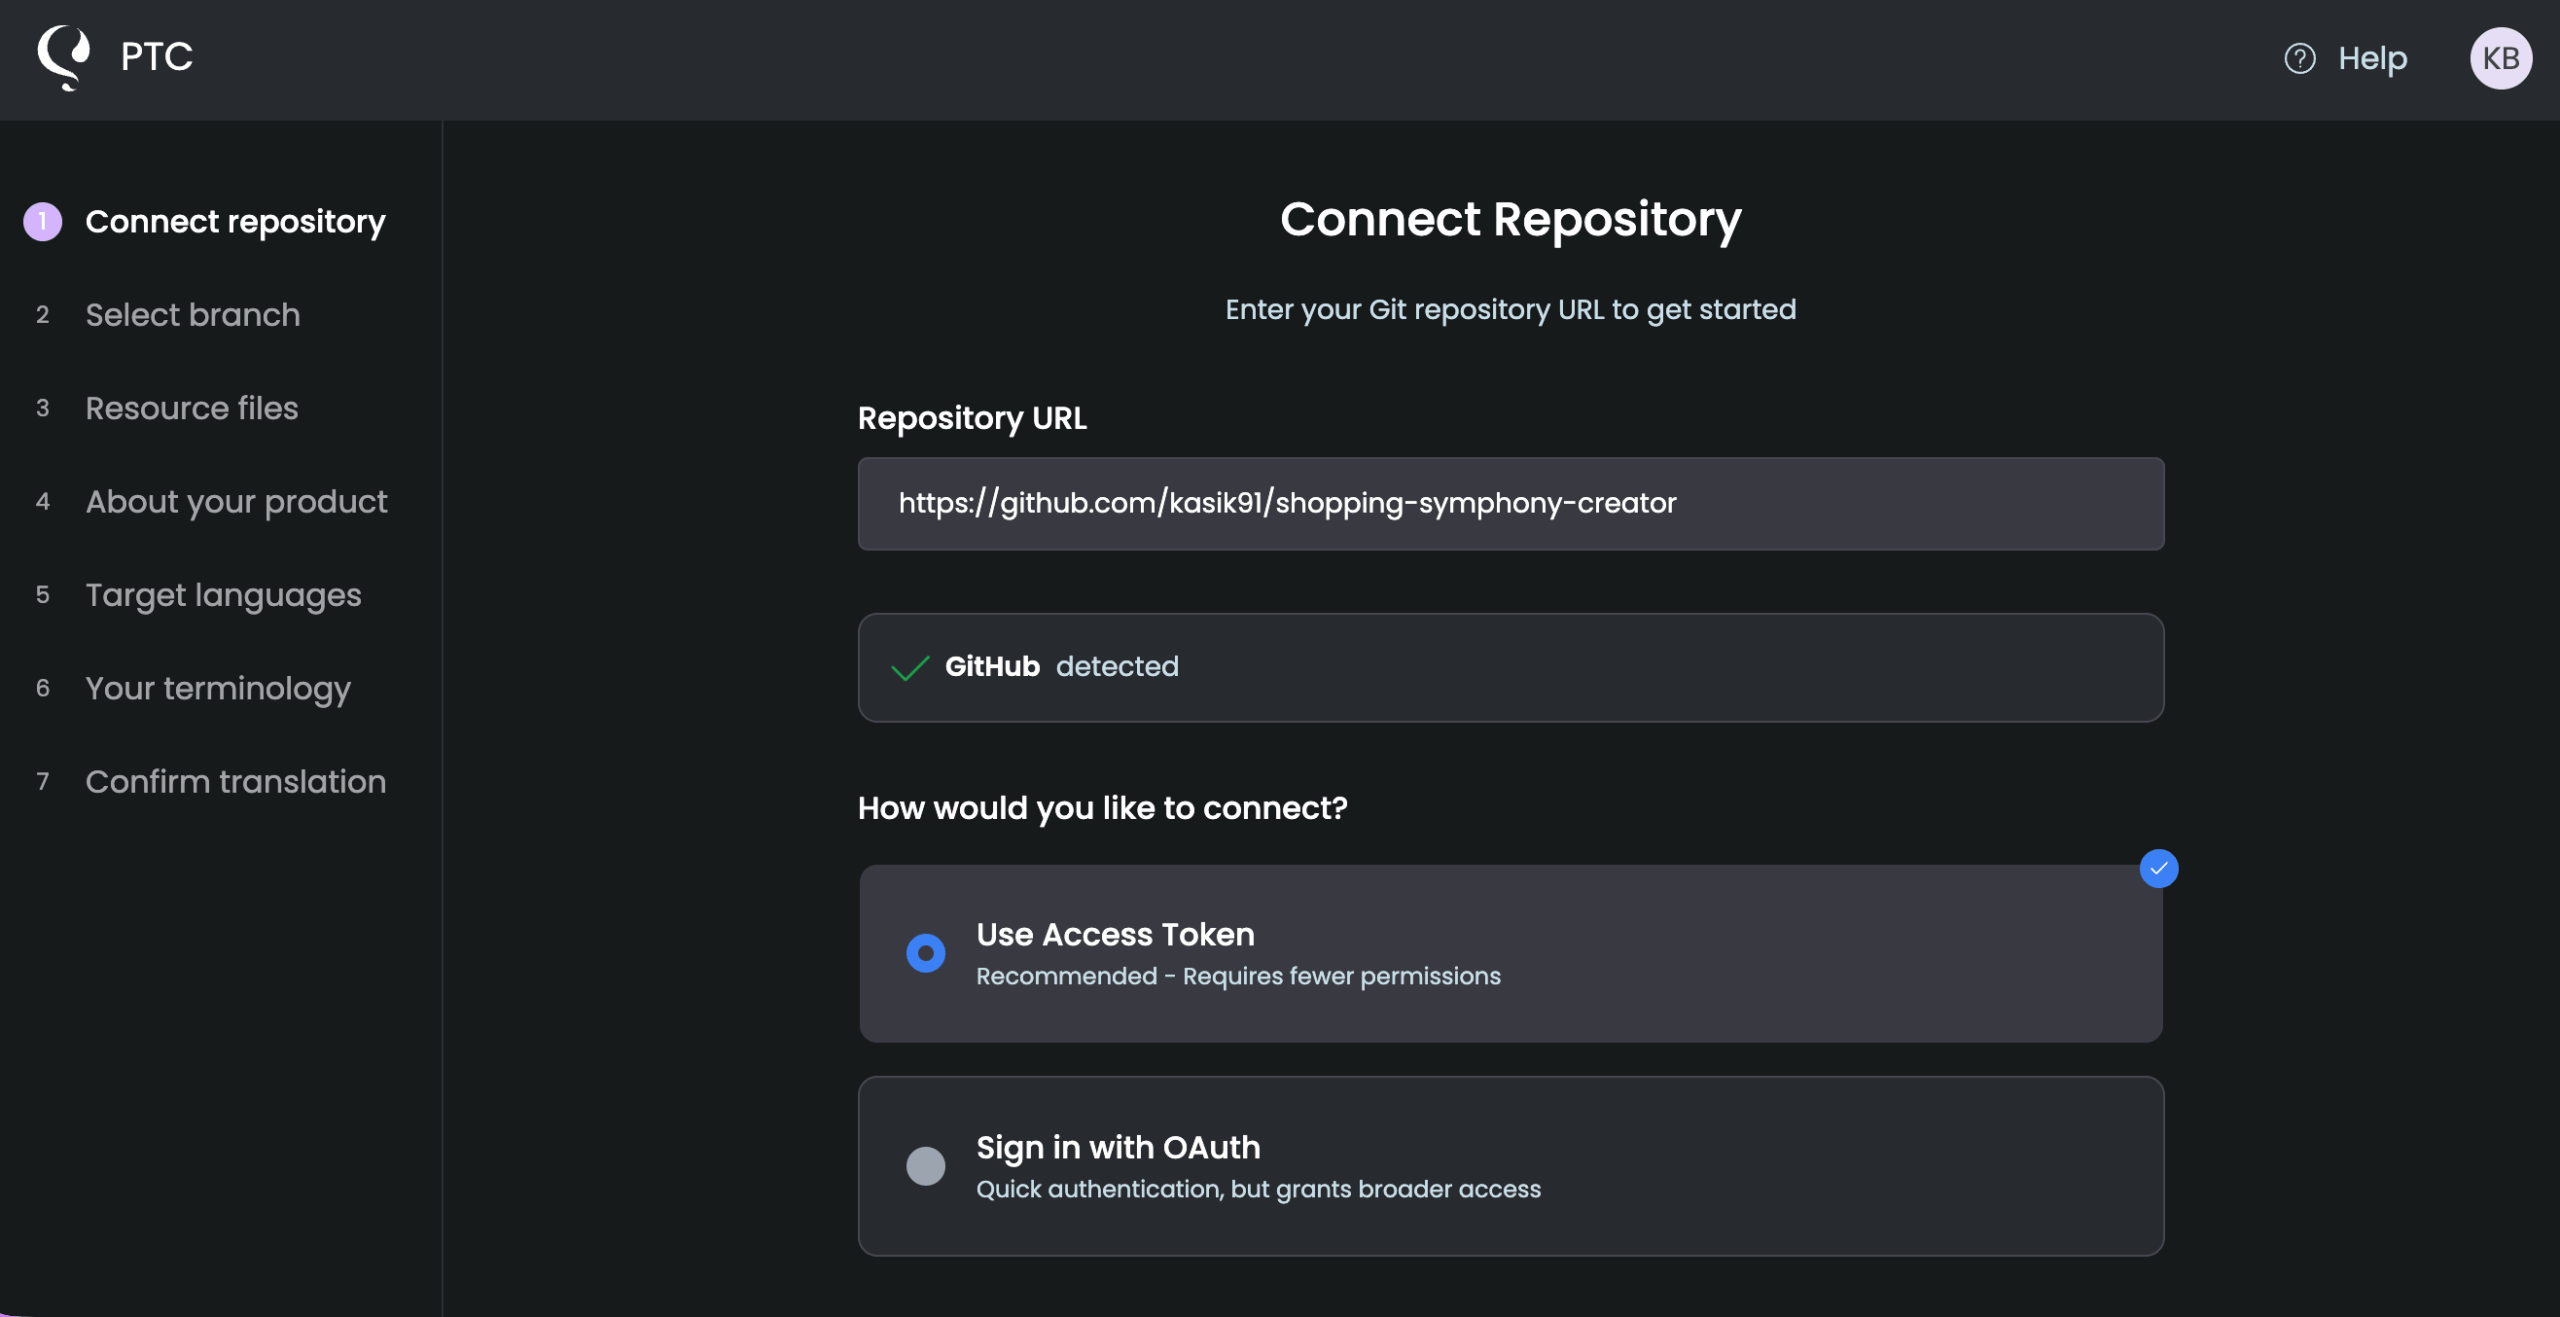
Authenticate in GitHub
To give PTC access to your repository, you can use an access token (recommended) or sign in with OAuth. If you connect using an access token, make sure it includes the correct scopes and repository access.
| Where to create it | Resource owner | Required permissions | Repository access | |
|---|---|---|---|---|
| Personal Fine-Grained Token | Personal access tokens in Developer Settings | Your GitHub user account | Choose “Only select repositories” (recommended) or “All repositories” | Commit statuses → Read-only Contents → Read and write Pull requests → Read and write Webhooks → Read and write |
| Organization Fine-Grained Token | Personal access tokens in Developer Settings Important: Creating a fine-grained access token may be restricted by your organization’s access policies. If you can’t create the token, ask an organization admin to review the Personal Access Token Policy settings in GitHub. |
The GitHub organization | Choose “Only select repositories” (recommended) or “All repositories” | Commit statuses → Read-only Contents → Read and write Pull requests → Read and write Webhooks → Read and write |
Store the token securely and add it to PTC. It will verify your permissions and prompt you to choose which branches to monitor.
Translate Files in Your Repository with PTC
Once your GitHub repository is connected to PTC, continue through setup to add languages and project details.
While PTC can work with existing translation files in your repo, translating your entire project with PTC ensures consistency across all languages.
Check Pull Requests
PTC typically takes only a few minutes to translate the files in your selected GitHub branch. Once complete, PTC will send you an email with a link to the pull request.
Review and approve the pull request when ready. PTC’s translations are production-quality and can be merged without manual review.
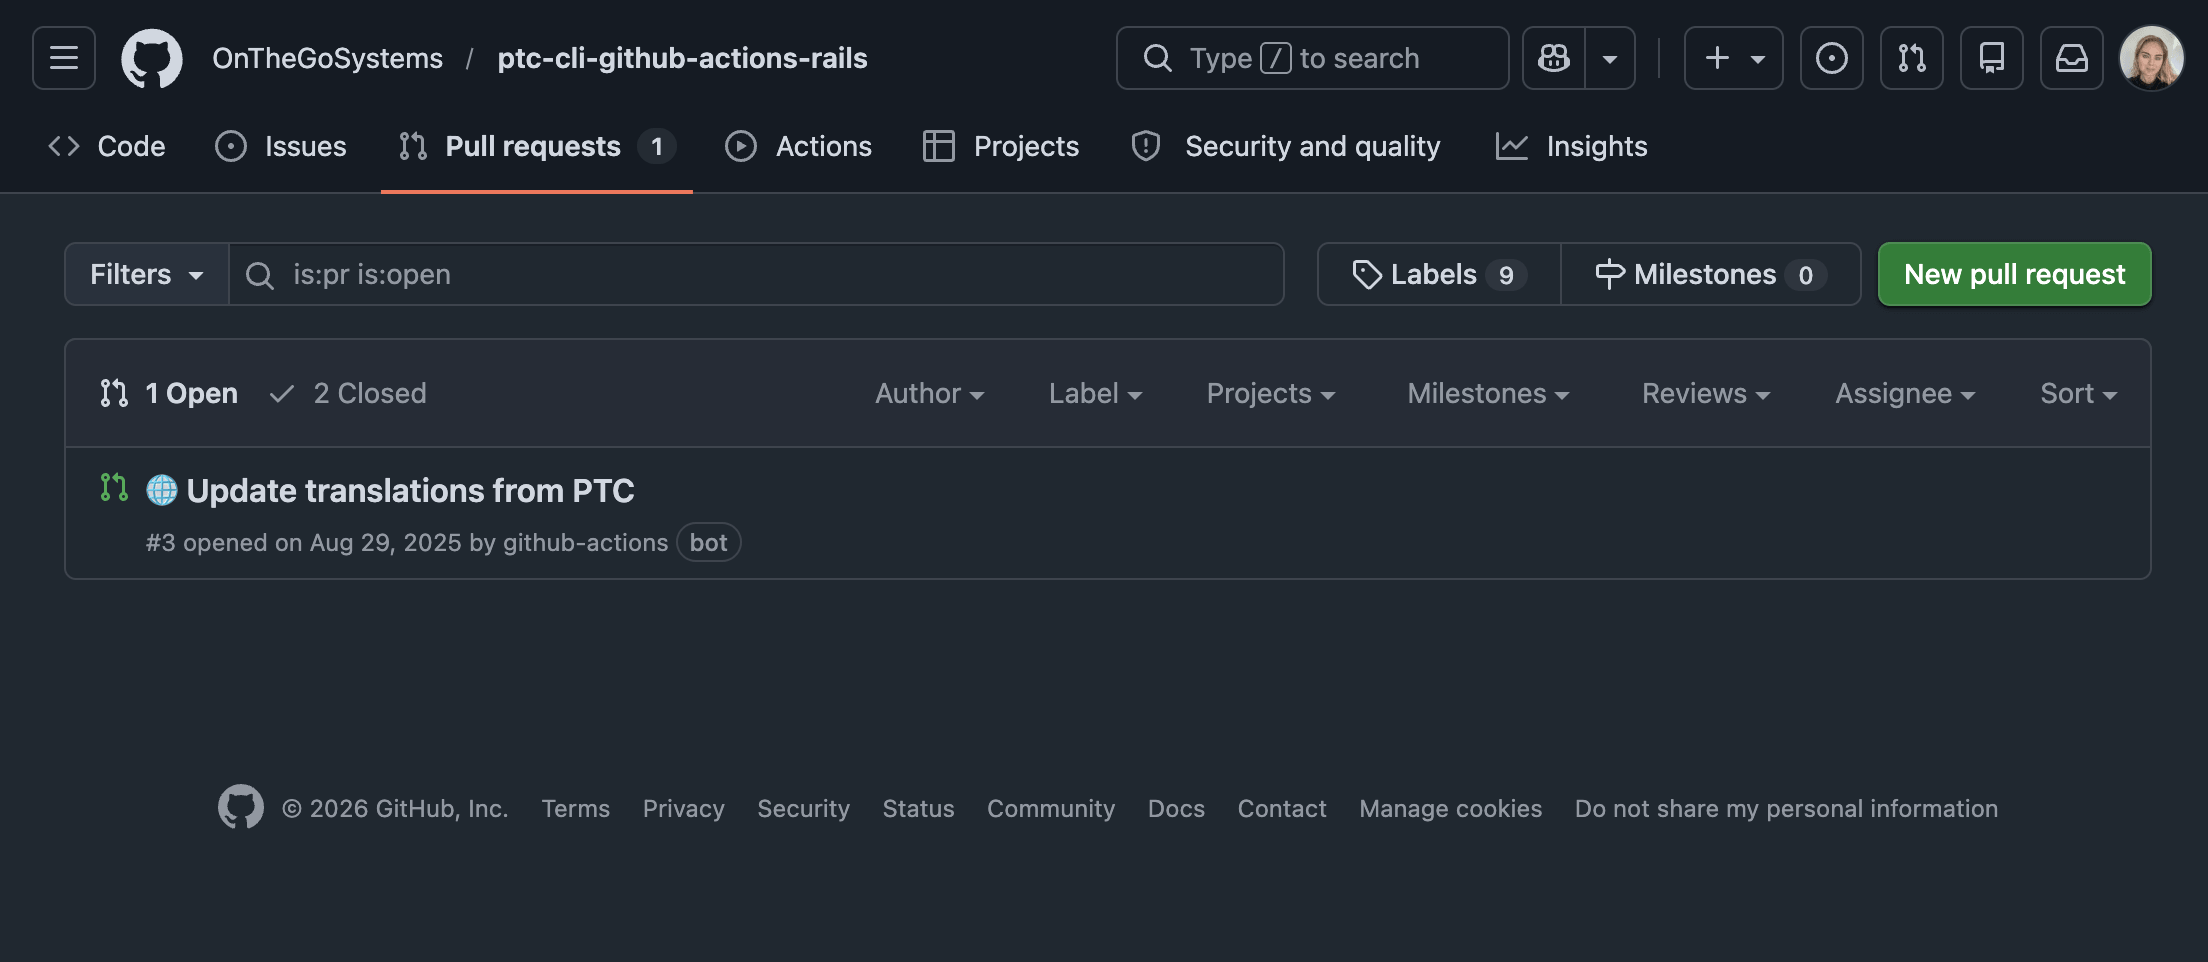
After you merge the first translations, PTC continues to monitor your resource files and will send new pull requests with updated translations whenever changes are detected.
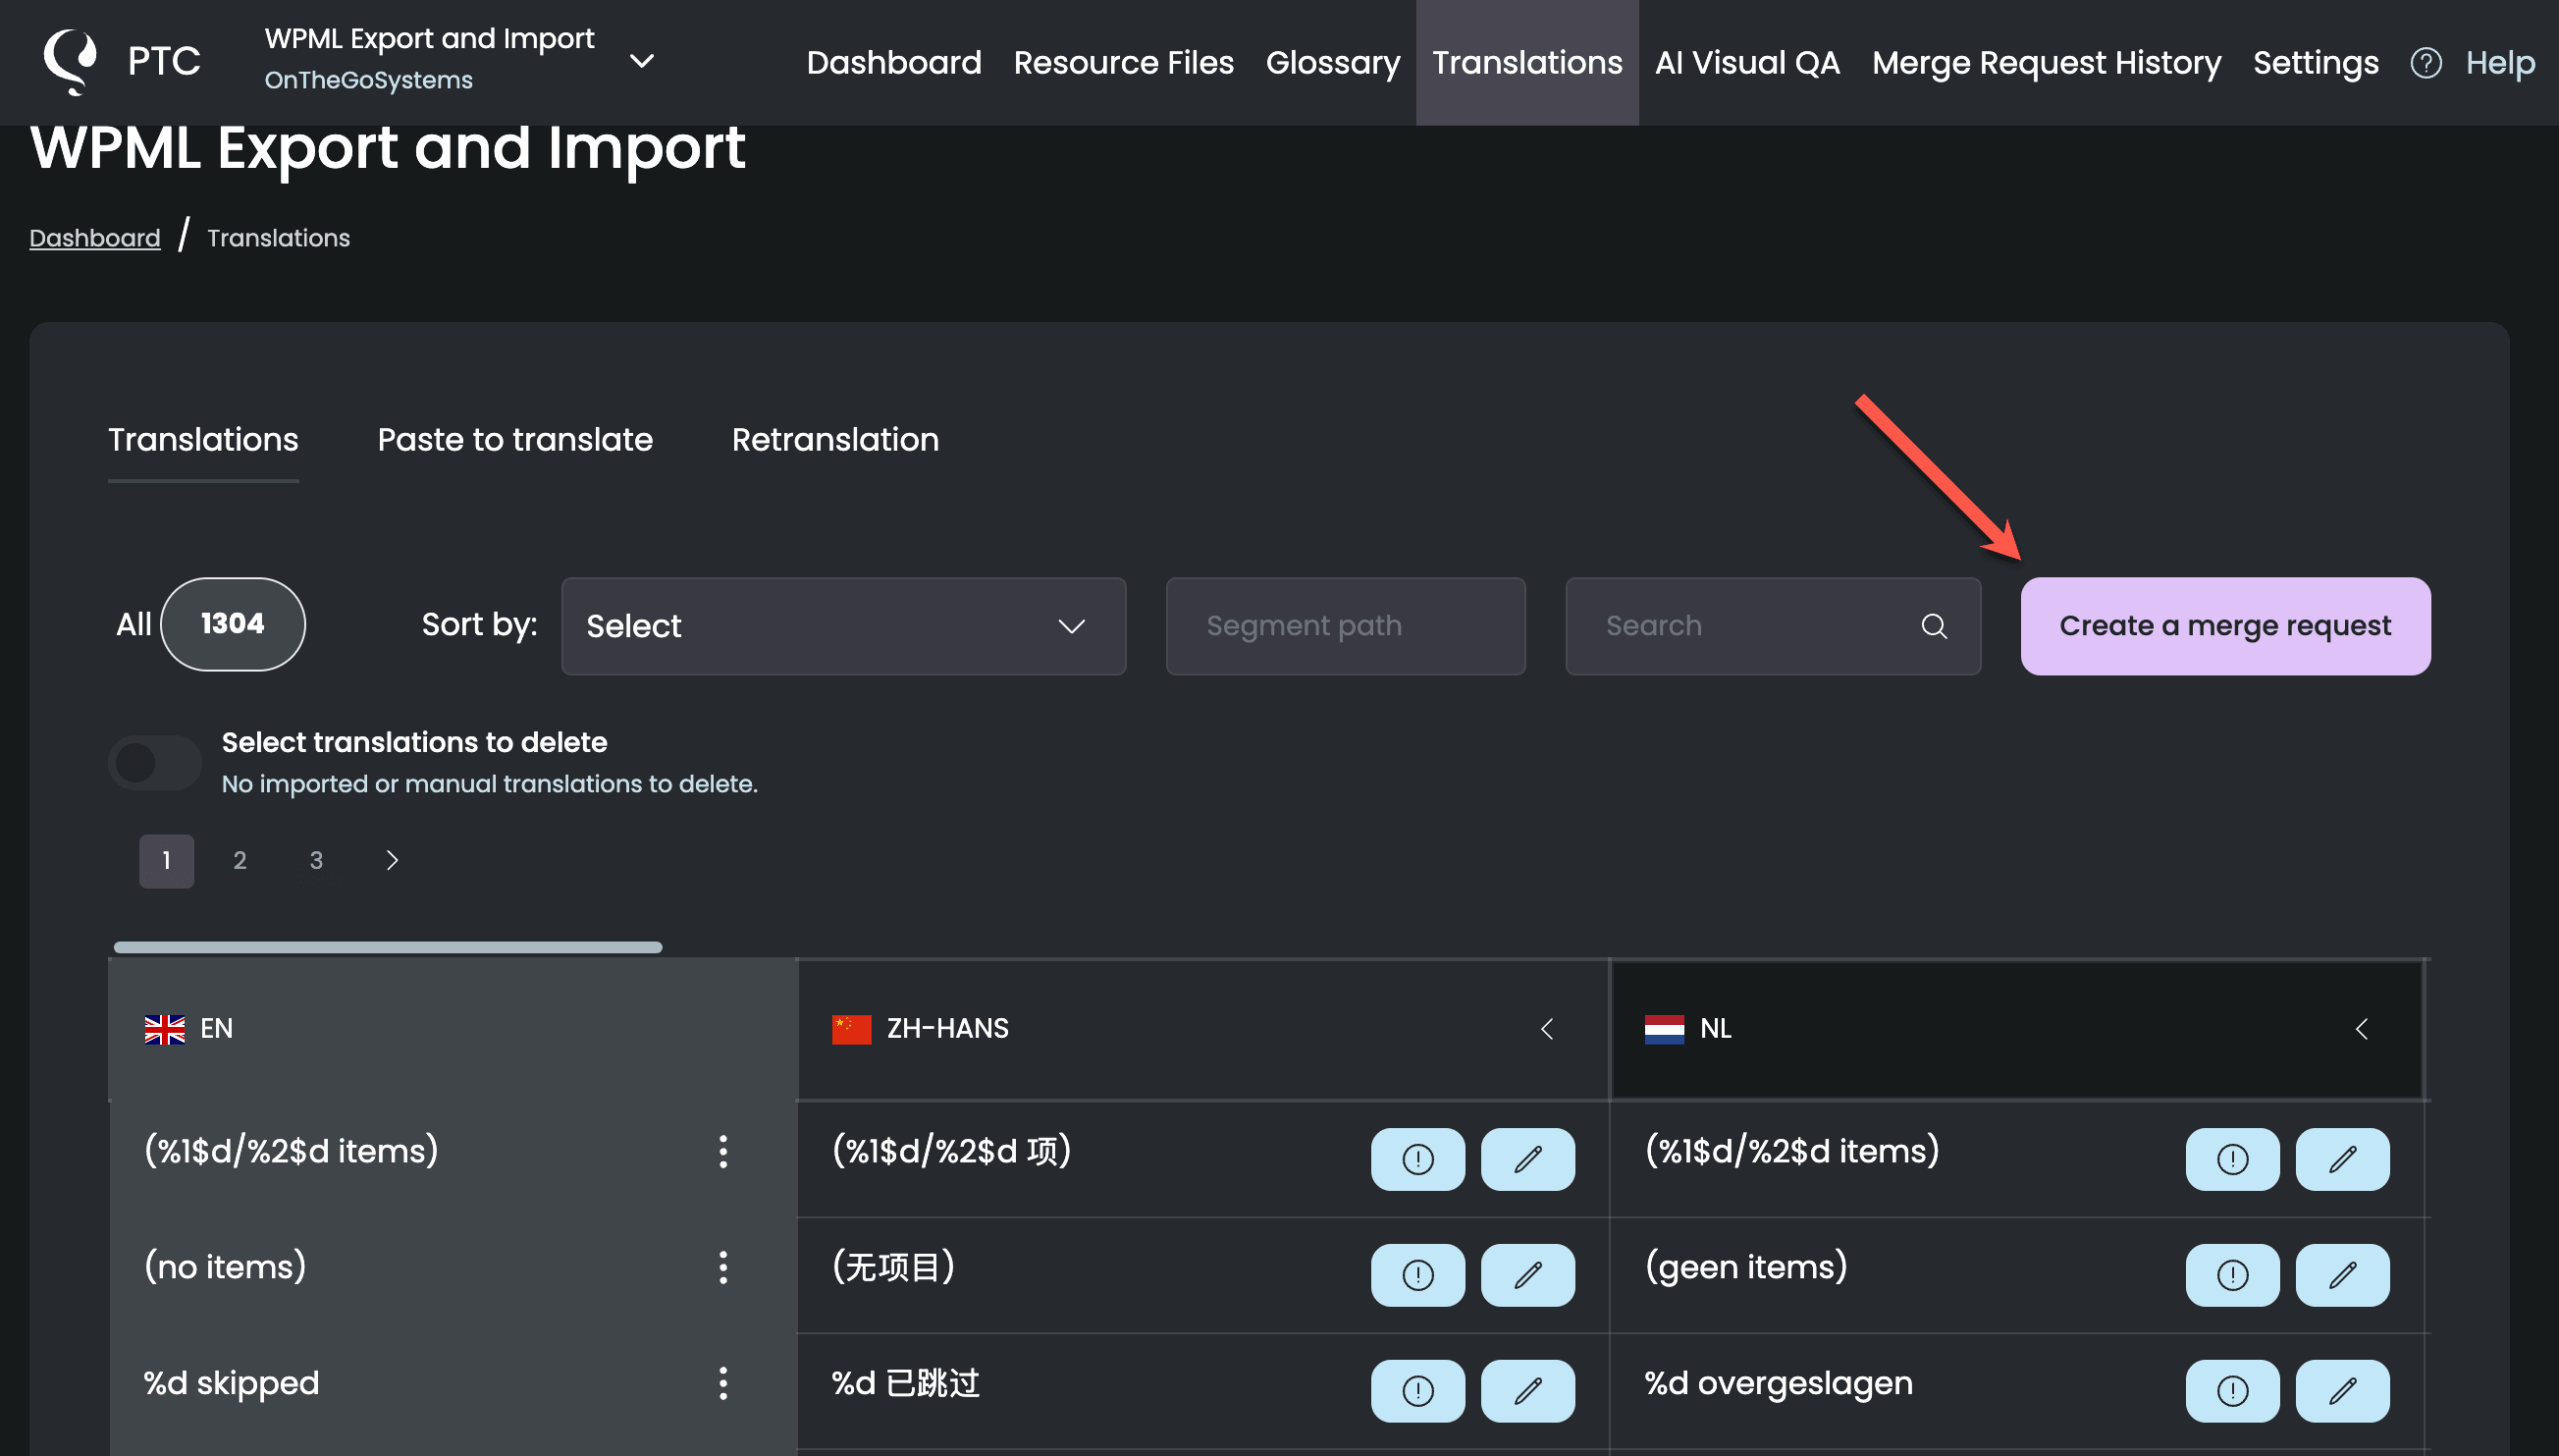
How to Generate New Pull Requests Manually
Go to the Translations tab in PTC to see translations in every language you selected, organized in a table. From this page, you can make edits or ask PTC to retranslate — for example, when translations exceed a length limit.
Click Create a merge request to send a new pull request with the updated translations.
Add New Resource Files for Translation
If you add new resource files to your repository after connecting with PTC, you can ask PTC to check for them.
- Go to Settings → Monitored Files and click Rescan your repository. PTC will scan your repository and display any newly discovered files as drafts.
- Click the + icon next to a discovered file to include it for translation, then click Save with translation to confirm.
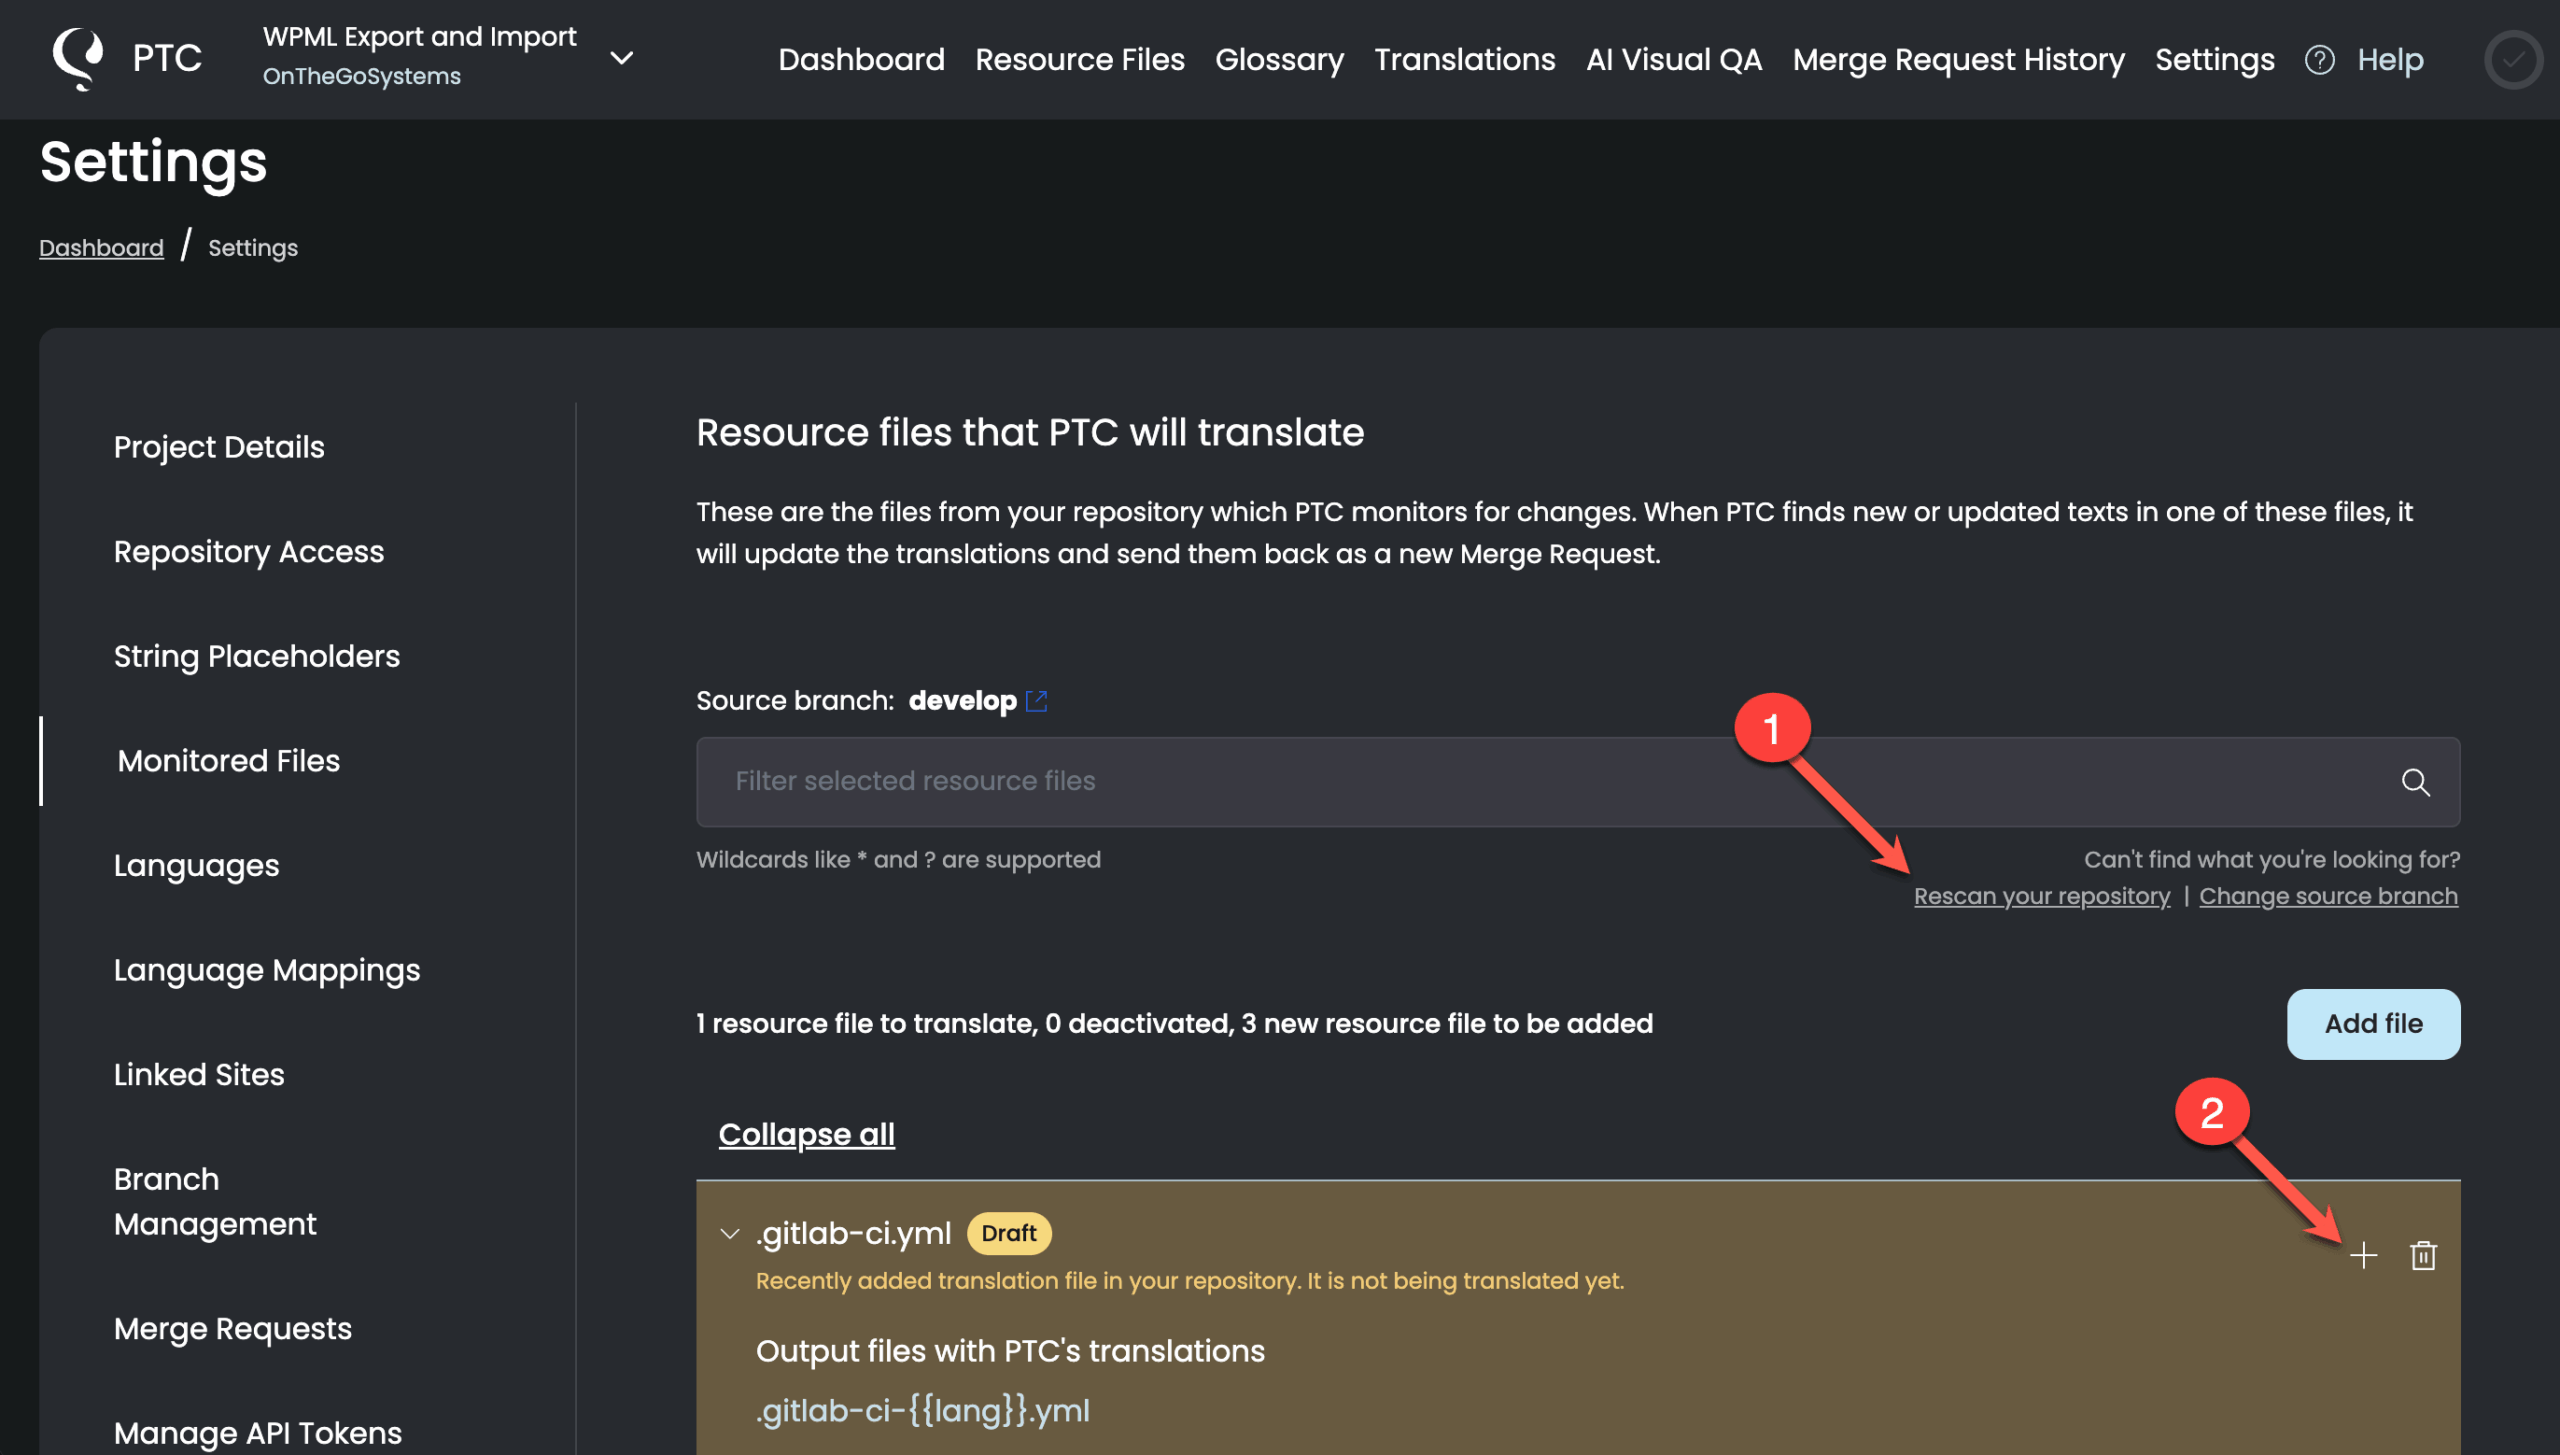
Select the Automatically include new translation files checkbox to have PTC monitor and include newly discovered resource files without asking for confirmation each time.
Why Localize Your GitHub Projects with PTC
Easy Connection to Your Repository
PTC integrates directly with your GitHub repository, eliminating manual file uploads and downloads, or the need to run translation scripts.
Real-Time Synchronization
PTC monitors your GitHub repository for changes in resource files, automatically generates translations, and sends them back via pull requests.
Faster Localization for Global Markets
PTC speeds up the localization process by delivering high-quality translations automatically via pull requests. Quickly adapt your software for global markets and shorten your time-to-market.
Only the Repository Access It Needs
PTC uses read access to detect changes in your resource files and write access to deliver translations via pull requests. PTC only interacts with the files it manages for translation and does not make changes to any other parts of your repository.
Localization That Keeps Pace with Your Release Cycle
PTC is designed for development teams that want localization to move at the same pace as their code. PTC monitors your repository for new or updated strings and delivers translations back automatically via merge request, so localization never becomes a bottleneck in your release cycle.
It works with the file formats common in software and mobile development, including PO files and JSON files. For more on how PTC fits into these workflows, see our software localization and mobile app localization pages.
Works with GitHub, GitLab, and Bitbucket
In addition to GitHub, PTC integrates with GitLab and Bitbucket, offering the same automated localization workflows and features for each platform.
Included at No Extra Cost
The GitHub integration is included at no extra cost. PTC has no subscription fees or per-feature charges. You only pay for the words you translate, and the first 500 words each month are free. For full pricing details, see the pricing page.