Learn how to import plugin and theme translations into WordPress.org using CLPTE. Includes step-by-step instructions, timelines, and a faster alternative.
To import theme or plugin translations into WordPress.org, you need a CLPTE (Cross-Locale Project Translation Editor) account. This guide covers the full WordPress.org import workflow with time estimates.
If you want to deploy translations in a faster and easier way, see the alternative method at the end.
Importing Translations to WordPress.org
Total time: 4–6 days
Step 1
Create a CLPTE Account
The CLPTE (Cross-locale Project Translation Editor) role lets you submit translations on behalf of your theme or plugin.
If you already have an account on WordPress.org, you may encounter issues such as your new account being disabled. This happens because WordPress does not allow multiple accounts.
To resolve this, contact forum-password-resets@wordpress.org and explain that you are trying to create a CLPTE account. It helps to share the relevant Polyglots documentation with the moderator and to ping the Polyglots team in Slack.
Estimated time: ~ 3–5 days
(includes waiting time if your new account is disabled)
Step 2
Request CLPTE Access on the Polyglots Blog
With your account enabled, make a CLPTE request for your plugin or theme on the front page of the Polygots blog. You’ll get a notification when your request is approved.
See the CLPTE request made by our team.
Estimated time: ~ 1 day
Step 3
Import Translation Files
To import translations created by PTC into WordPress.org:
- Log in to https://translate.wordpress.org/ using your CLPTE account.
- Go to your plugin or theme’s translation project page (for example, WPML Multilingual for Easy Digital Downloads).
- Open the local project for each language you have translated.
- Scroll down and click Import Translations.
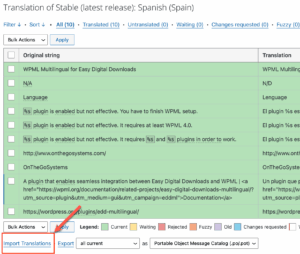
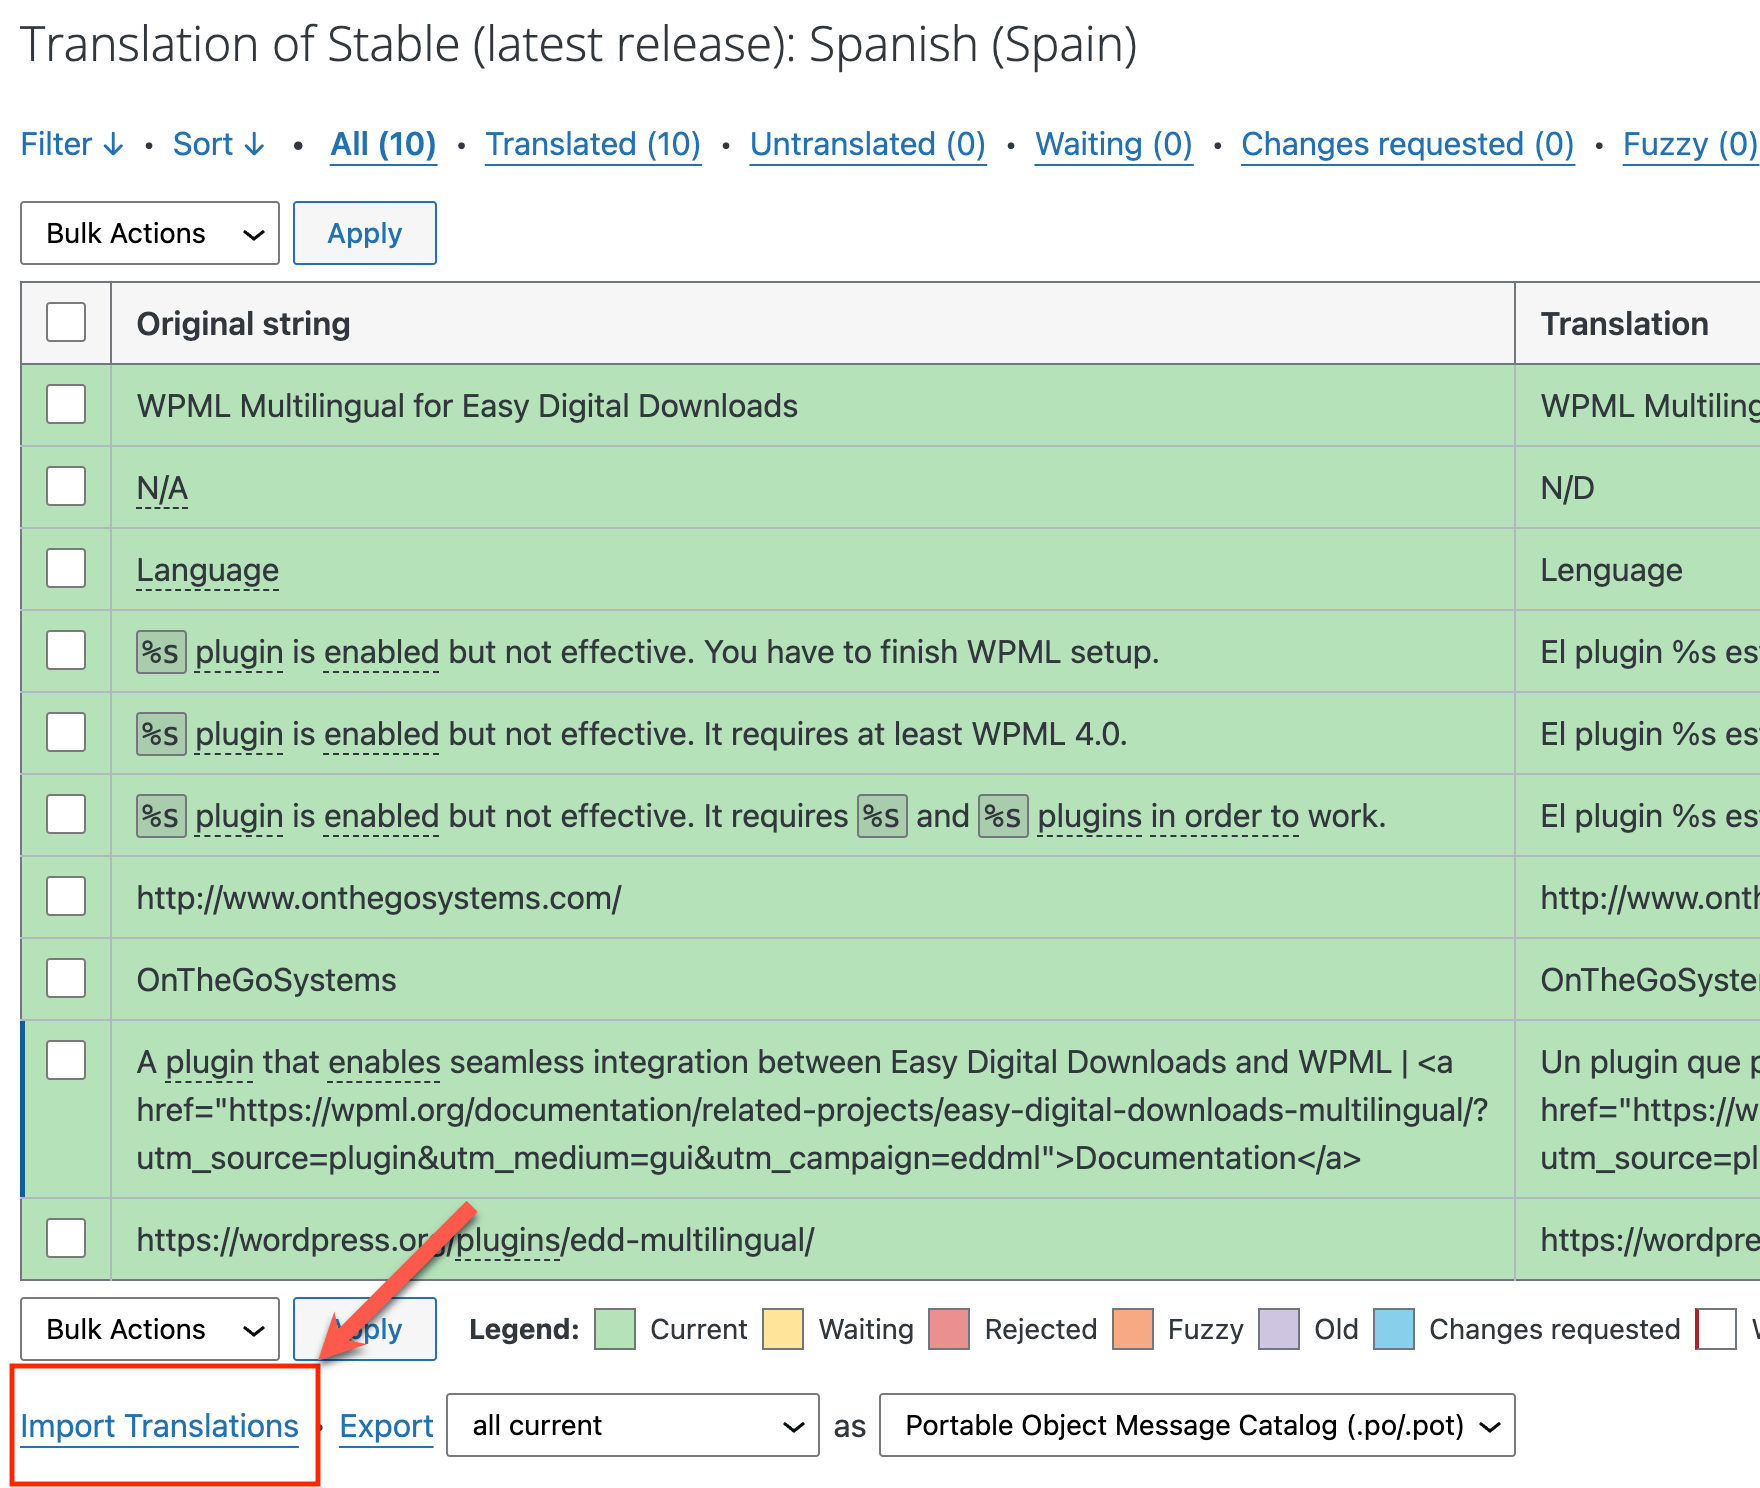
- Upload your
.poor.mofiles. - Repeat the steps for every language.
Estimated time: ~ 10–30 minutes
Limitations of Importing to WordPress.org
When you import translations to WordPress.org:
- You cannot replace existing community translations. Only untranslated strings are imported.
- To update existing translations, you must use the standard translation process and wait for the locale team’s review.
- Updates require manual uploads for every release.
- Account creation and approval can take up to a week.
Faster Alternative: Bundle Translations with Your Theme or Plugin
For full control over translations, you can include translation files in your plugin or theme. This way, users receive them as part of your product.
Total time: 15-30 minutes
1
Add Translation Files
Place your compiled .mo files inside your plugin or theme’s /languages/ directory. This structure ensures WordPress can find them when loading your text domain.
Example:
my-plugin/
 ├─ my-plugin.php
 ├─ languages/
 │   ├─ my-plugin-es_ES.mo
 │   ├─ my-plugin-fr_FR.mo
Tip: Use the same text domain in your translation file names and your load_plugin_textdomain() or load_theme_textdomain() calls.
Estimated time: ~ A few minutes
2
Configure WordPress to Load Your Translation Files
By default, WordPress prioritizes community translations from WordPress.org over bundled ones.
To make sure your plugin or theme uses the bundled .mo files instead of community translations, add the load_textdomain_mofile filter.
Example usage for plugins
Add this snippet to your main plugin file (for example, my-plugin.php):
function my_plugin_load_embedded_translation_file( $mofile, $domain ) {
    if ( 'my-domain' === $domain && false !== strpos( $mofile, WP_LANG_DIR . '/plugins/' ) ) {
        $locale = apply_filters( 'plugin_locale', determine_locale(), $domain );
        $local_mofile = WP_PLUGIN_DIR . '/' . dirname( plugin_basename( __FILE__ ) ) . '/languages/' . $domain . '-' . $locale . '.mo';

        if ( file_exists( $local_mofile ) ) {
            return $local_mofile;
        }
    }
    return $mofile;
}
add_filter( 'load_textdomain_mofile', 'my_plugin_load_embedded_translation_file', 10, 2 );
Example usage for themes
Add this snippet to your theme’s functions.php file:
function my_theme_load_embedded_translation_file( $mofile, $domain ) {
    if ( 'my-domain' === $domain && false !== strpos( $mofile, WP_LANG_DIR . '/themes/' ) ) {
        $locale = apply_filters( 'theme_locale', determine_locale(), $domain );
        $local_mofile = get_template_directory() . '/languages/' . $locale . '.mo';

        if ( file_exists( $local_mofile ) ) {
            return $local_mofile;
        }
    }
    return $mofile;
}
add_filter( 'load_textdomain_mofile', 'my_theme_load_embedded_translation_file', 10, 2 );
Estimated time: ~ A few minutes
3
Verify Your Translations Load Correctly
Confirm that WordPress is loading the translations you included in your plugin or theme instead of the community translations from translate.wordpress.org.
Do this by installing your plugin or theme on a test site and switching WordPress to one of the languages you’ve provided.
- Go to Settings → General → Site Language and select a language that you’ve included in your
/languages/folder. - Load a page or screen that contains strings you know are translated in your
.mofile. - Check that the strings appear in the correct language and match the translations you added.
If you still see old community translations, review the code snippet in the previous step to make sure it correctly points WordPress to your bundled .mo files.
Estimated time: ~ A few minutes
Ready to import translations? First, you need translated .po files.
PTC provides AI translations for WordPress themes and plugins. Translate 20,000 words free into 2 languages—no credit card required.